Personal Project · Jul – Aug 2025

Large RC Car
v1 — where it started

ESP32 WROOM · DRV8876 · ESP-NOW · Fusion 360 · 3D Printing
✓ Working ESP-NOW Wireless Custom Remote Fusion 360 CAD

My first attempt at building a complete RC car from scratch — not just picking parts, but designing every component: chassis geometry in Fusion 360, a 3D-printed gamepad remote, and a custom ESP-NOW link between them. It drove. Slowly. But it taught me more about weight budgets and component selection than any tutorial could.

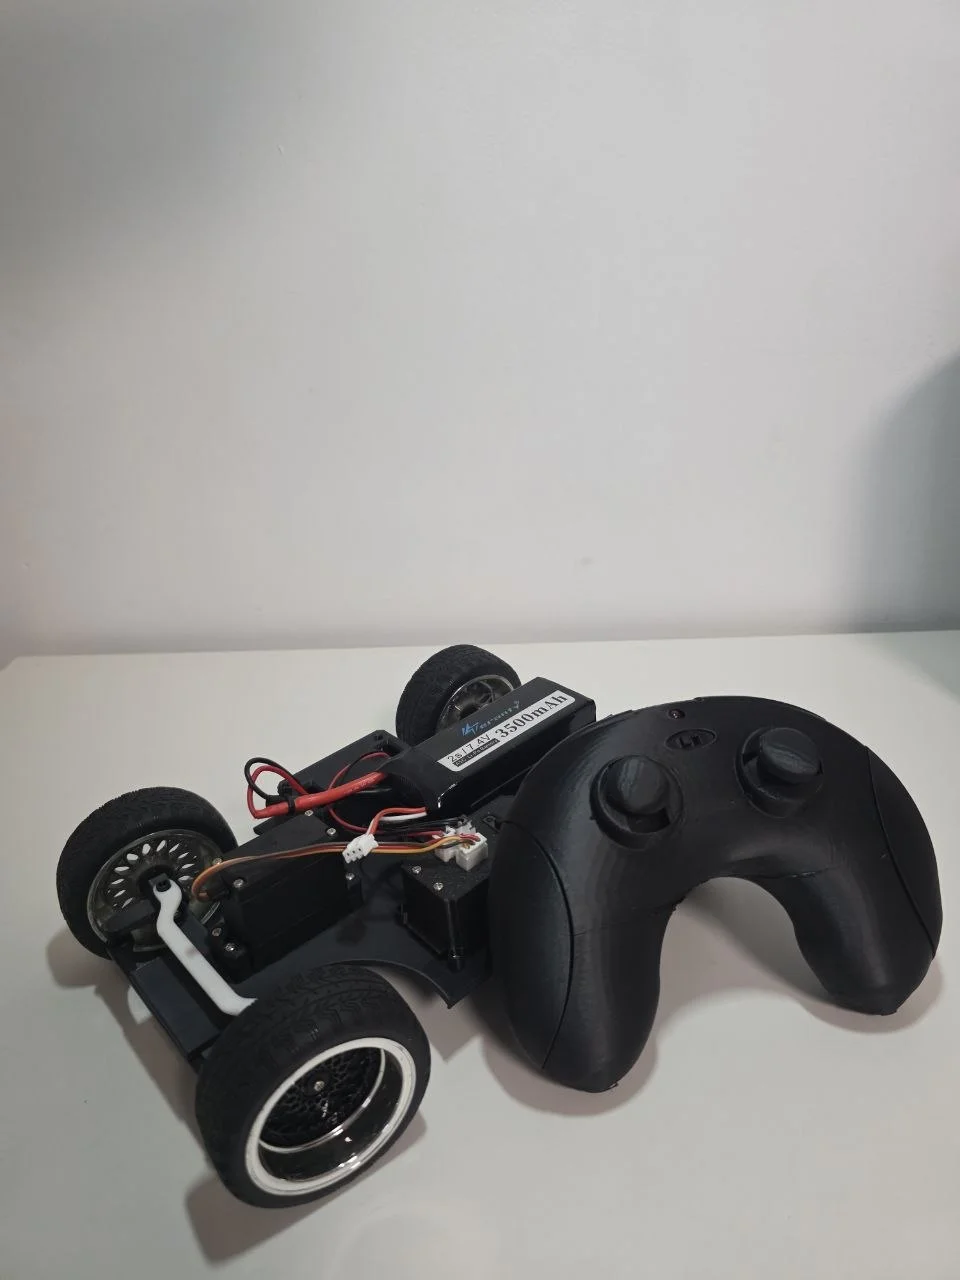
Large RC car — final build
Final build — no remote
Car without remote
Car with remote
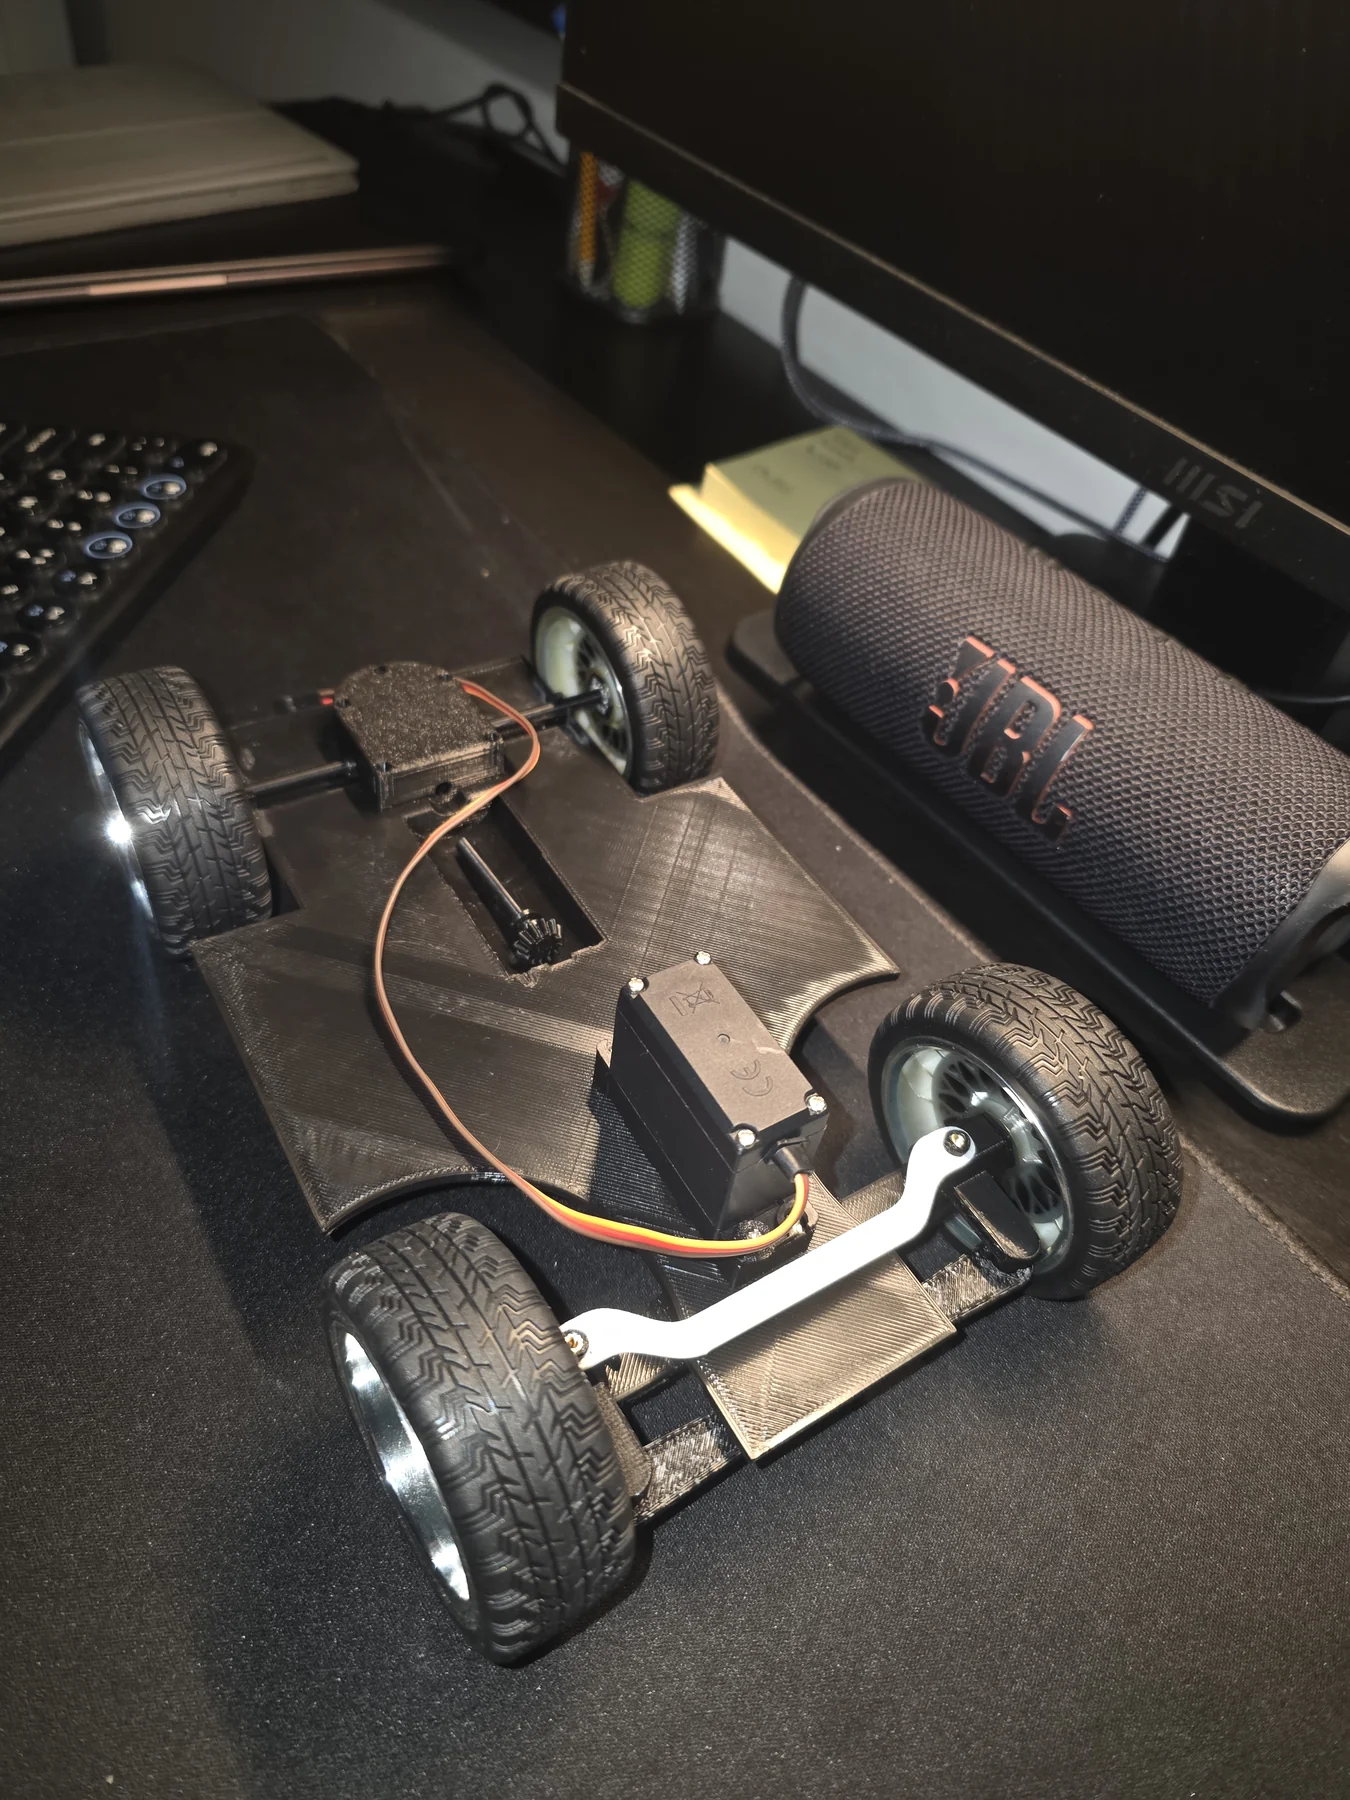
Chassis assembly
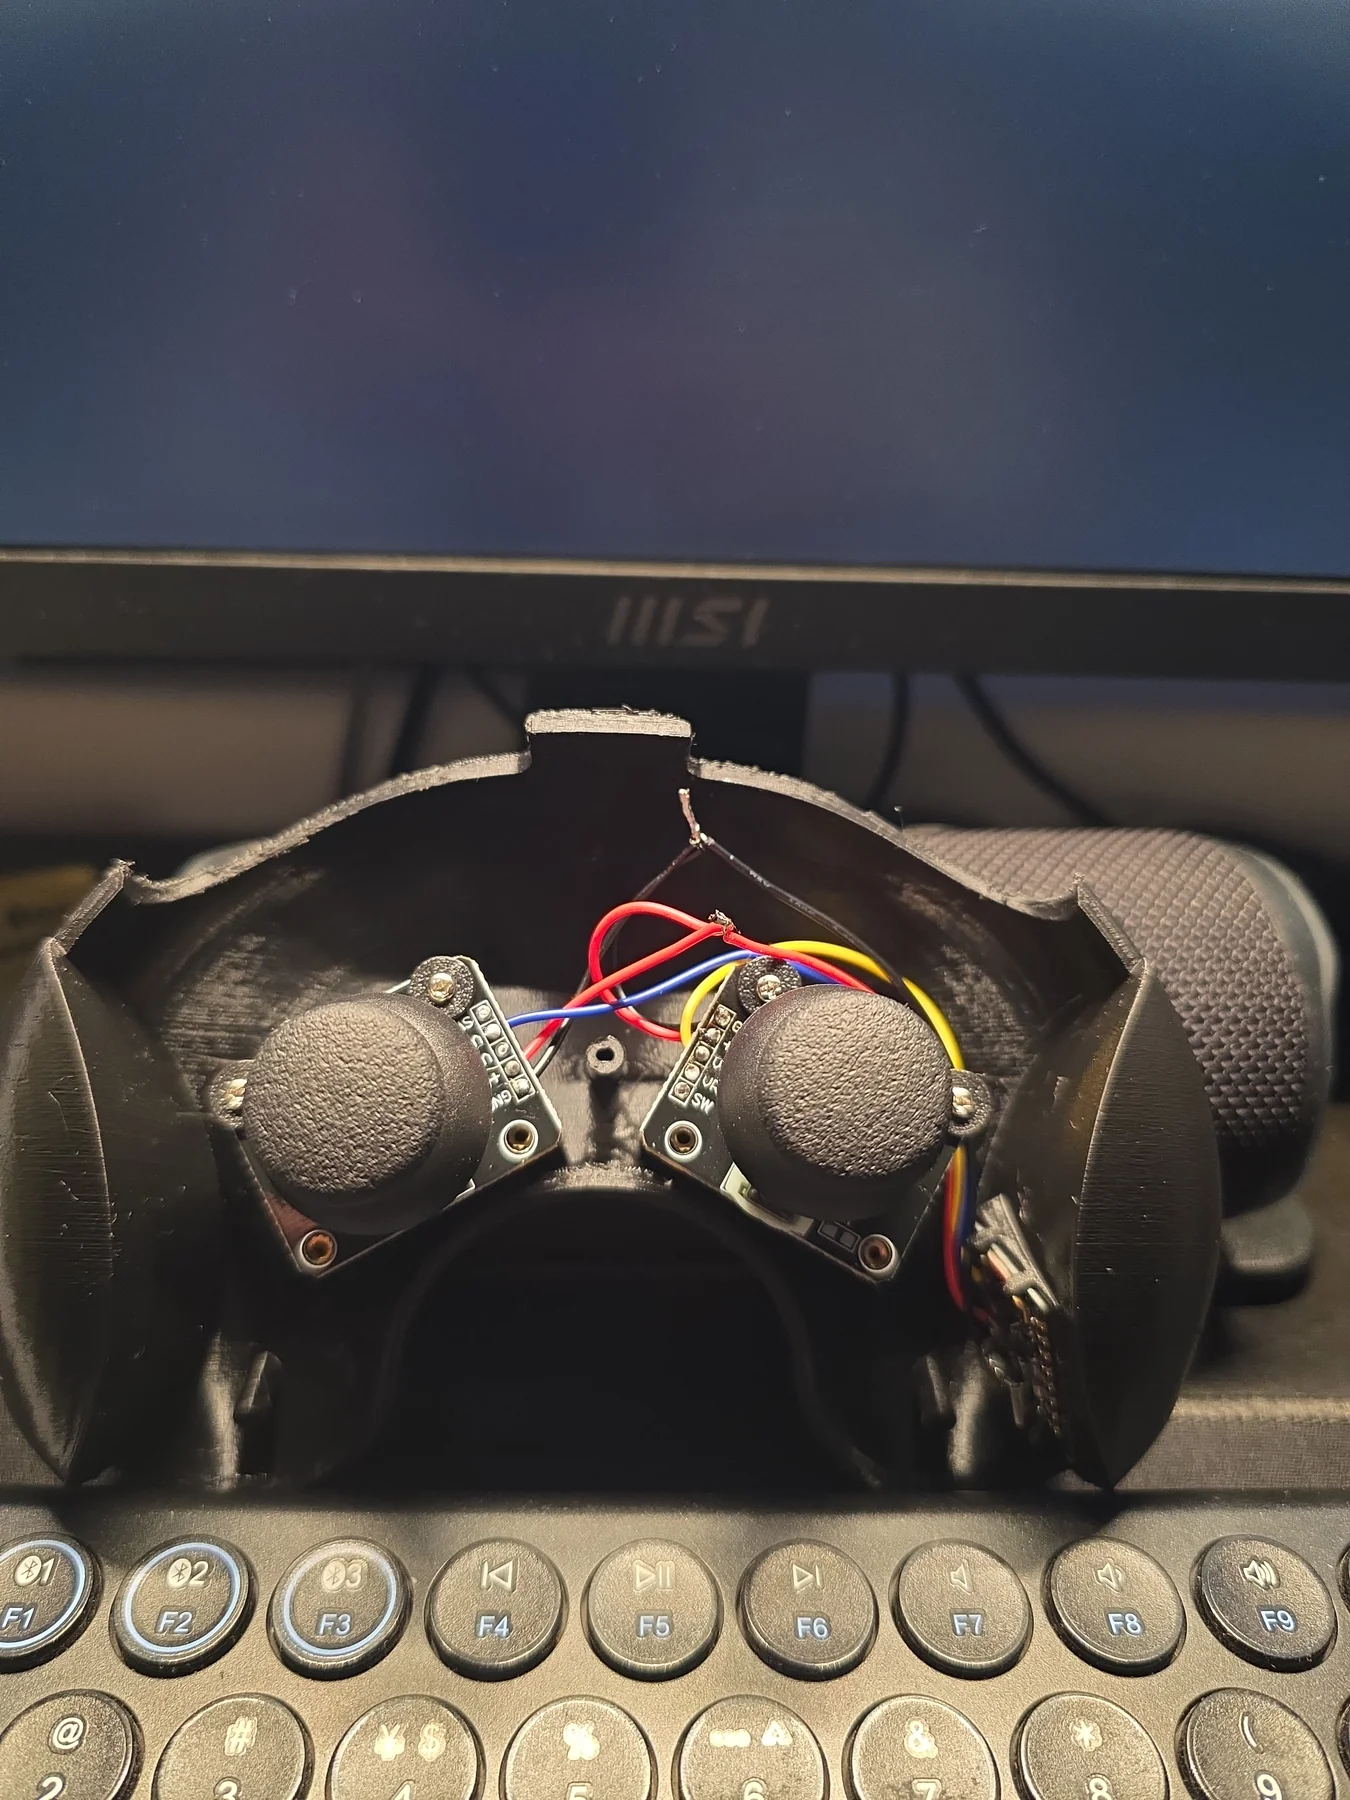
Remote joysticks
Chassis underside
Early electronics
Remote assembly
Remote slicer
Early build
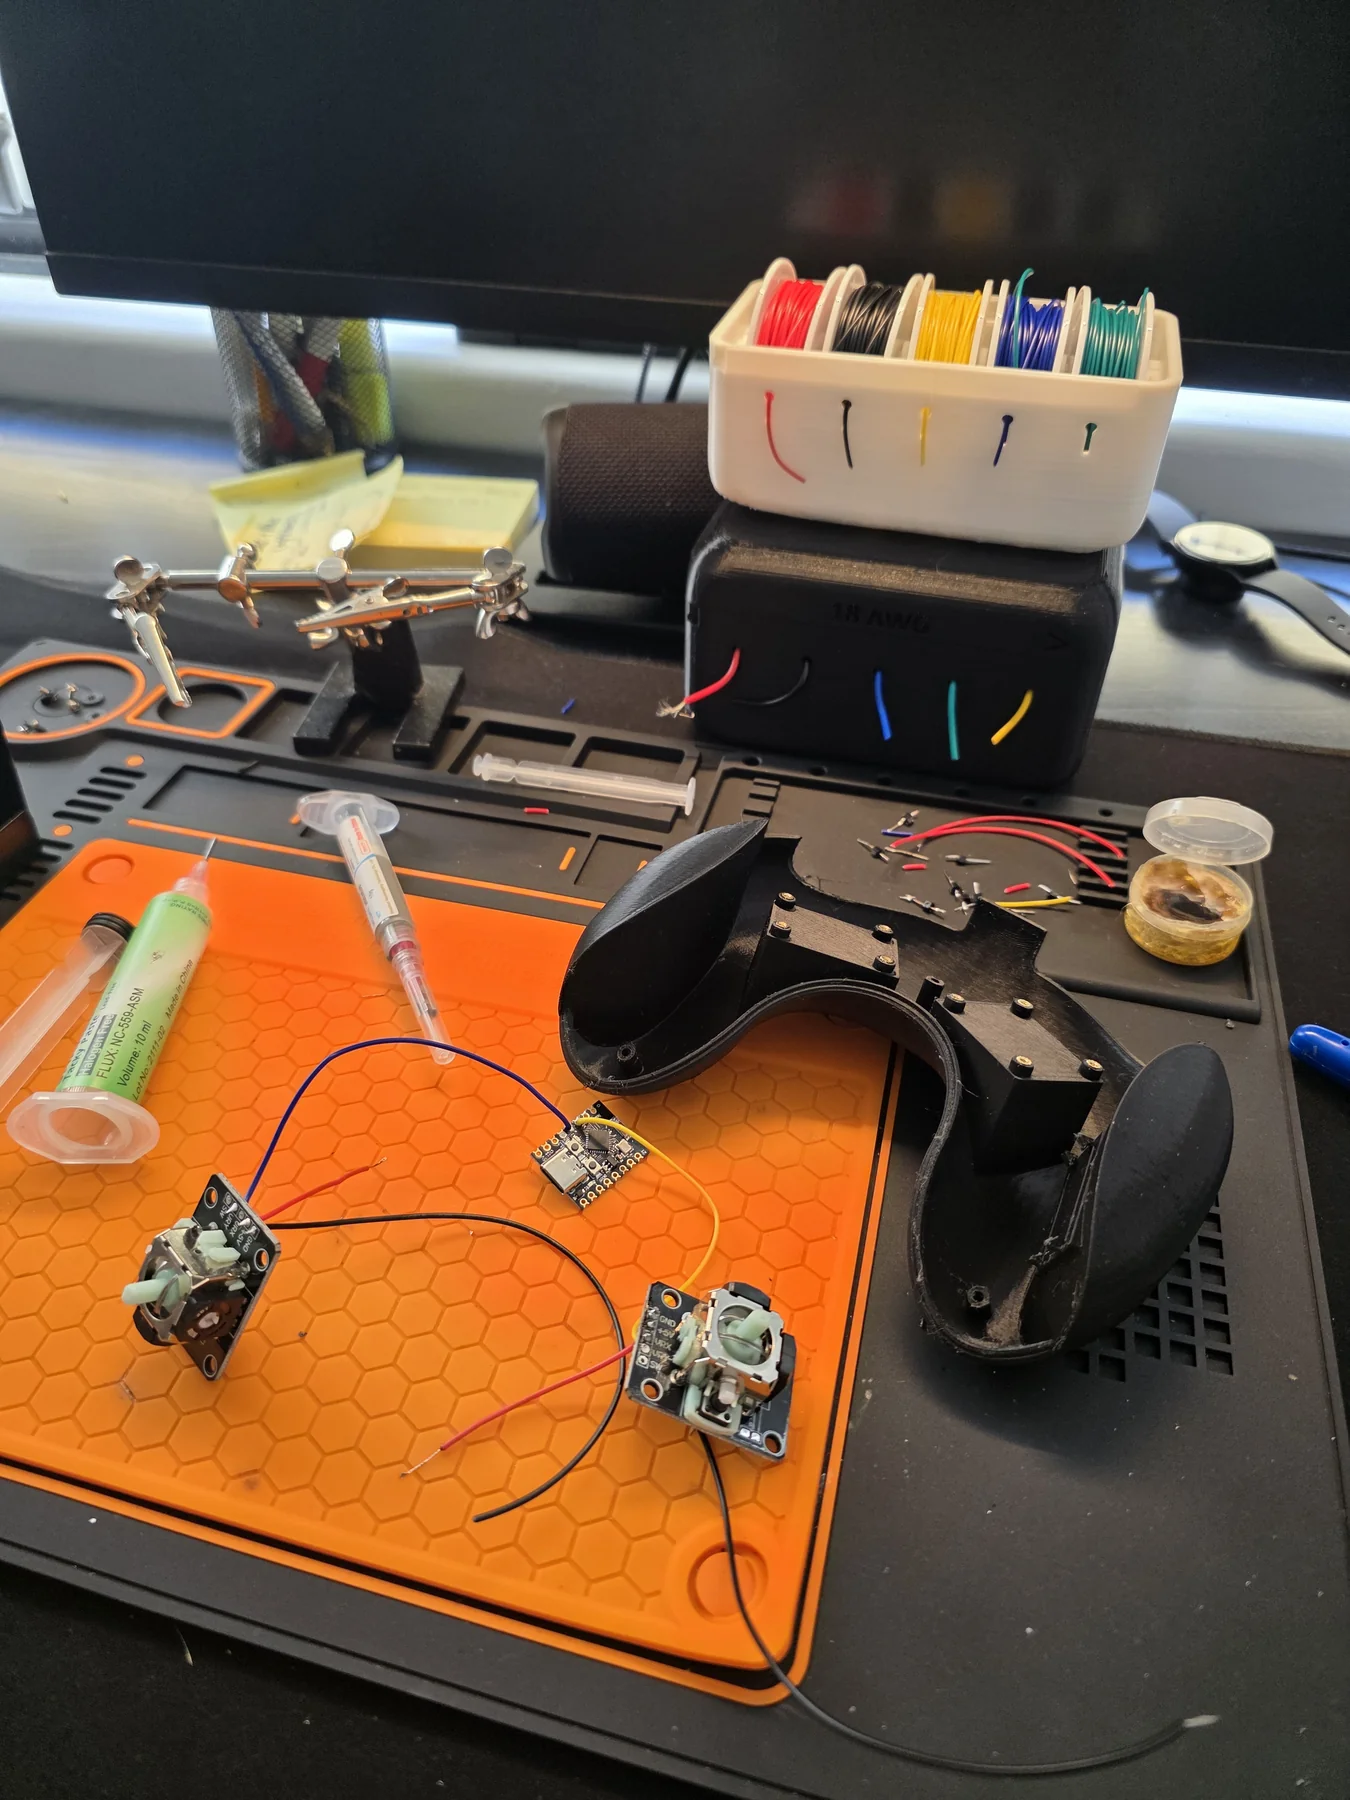
Workbench
Key Components
ESP32 WROOM (Car)
ESP32 WROOM (Remote)
DRV8876
MG996R Servo
ESP-NOW
Fusion 360
Build Progress
✓
Concept
✓
CAD Design
✓
3D Print
✓
Wiring
✓
Remote
✓
Assembled
What I Learned
  • The weight came from the motor, MG996R metal-gear servo, boost converter, and PLA casings — not the electronics. The ESP32 and driver chips barely register on a scale.
  • Building the remote from scratch was the most satisfying part — ESP-NOW is fast enough for RC use.
2
ESP32 WROOM Boards
~50 m
Wireless Range
7.4 V
2S LiPo Battery
565 g
Assembled Weight
Build walkthrough, remote design & videos below ↓
Controller
ESP32
WROOM on car + remote
Wireless
NOW
ESP-NOW · peer-to-peer
Motor Driver
DRV8876
Single H-bridge · IN1/IN2 mode
Steering
Ackermann
Servo-controlled front axle
At a Glance
TypePersonal project (first big build)
My roleSolo: CAD, 3D printing, wiring, remote, testing
TimelineJul – Aug 2025
SkillsAckermann steering · motor drivers · ESP-NOW · enclosure design
ToolsFusion 360 · Arduino C++ · 3D printing
StatusWorking, but slow: lessons went into the mini RC car

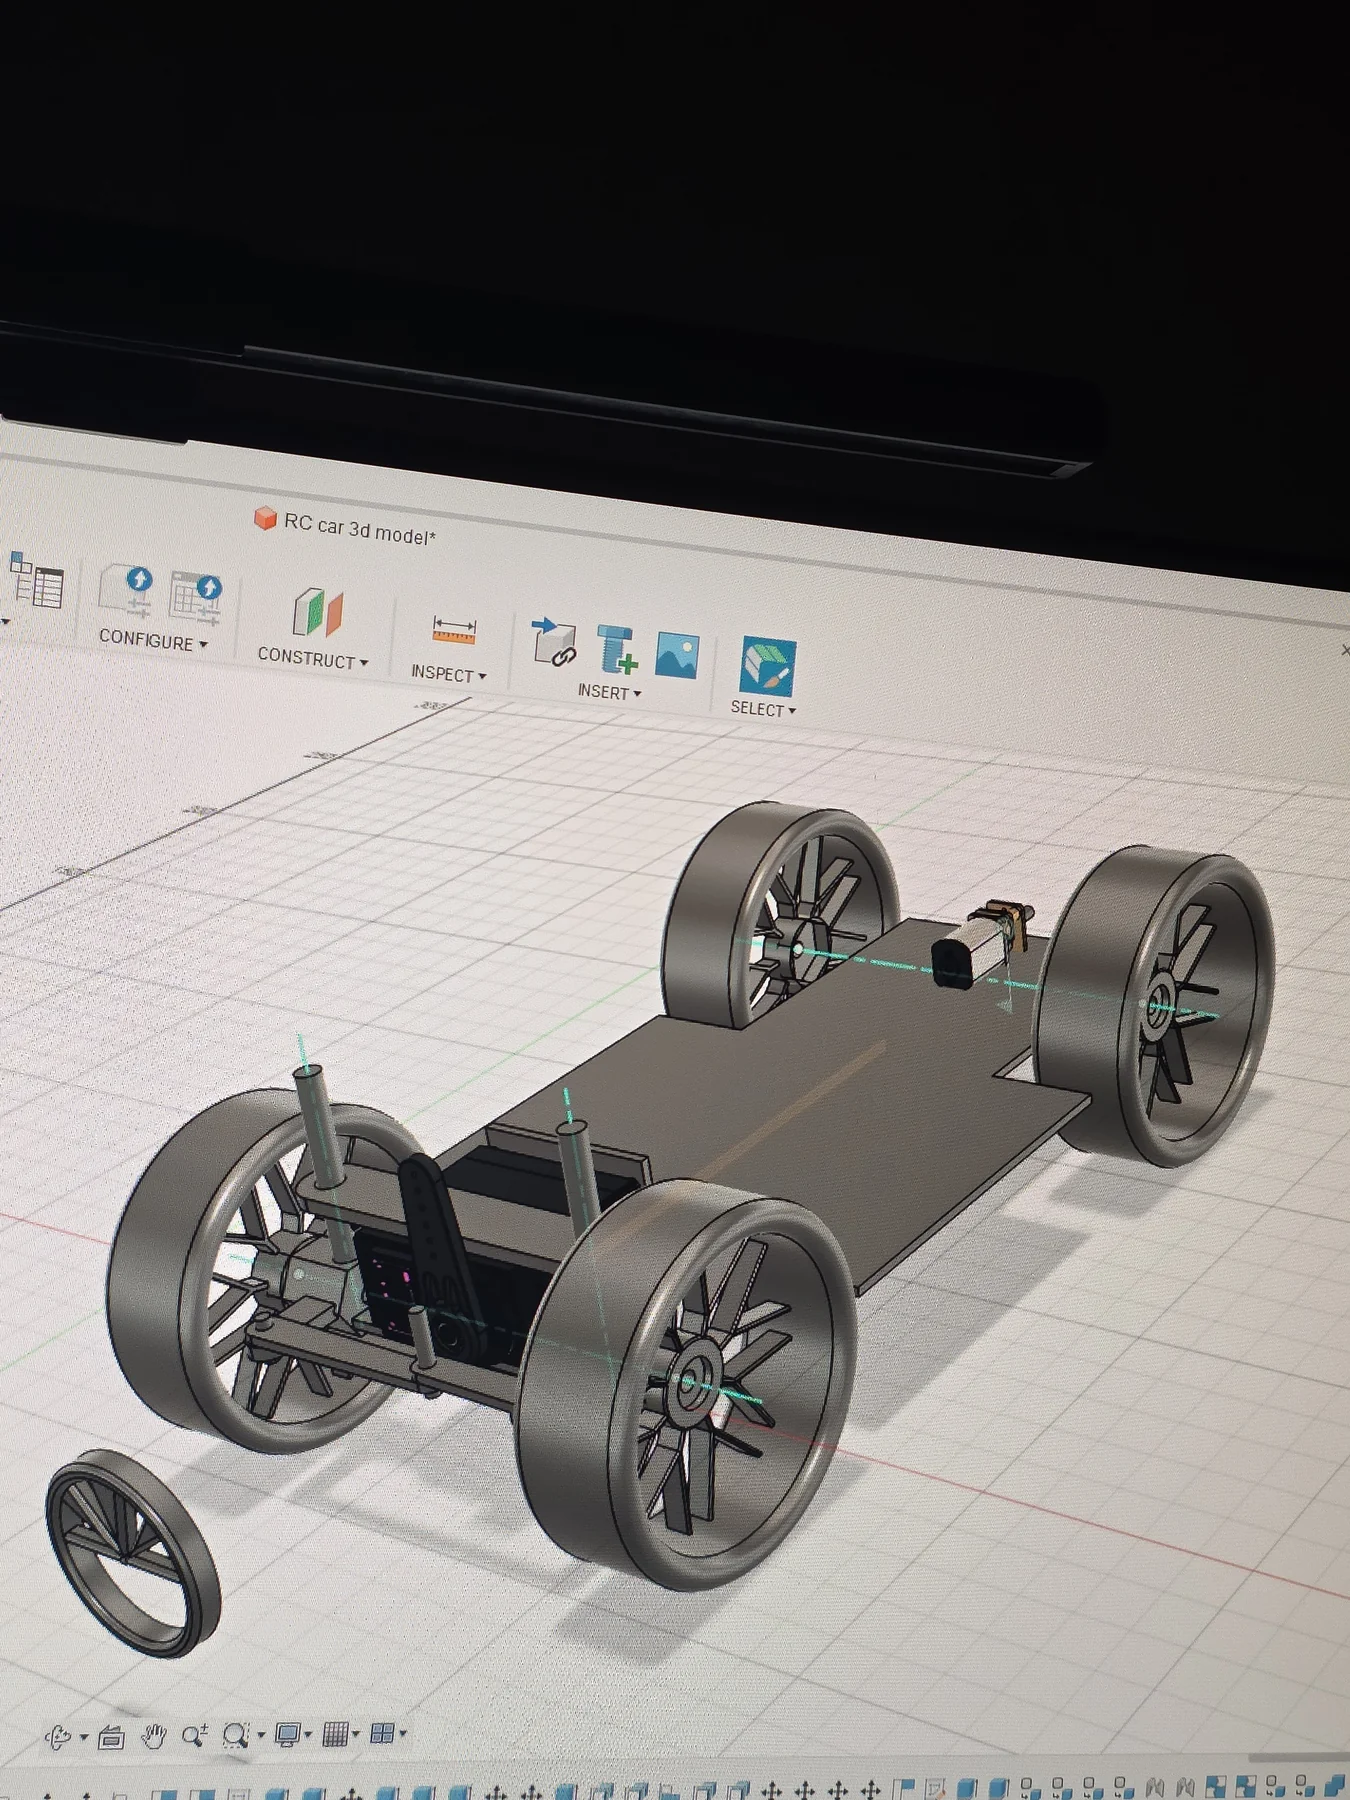
The idea was simple: build an RC car where I designed every part — chassis geometry, remote body, firmware. I started in Fusion 360, modelling the chassis geometry before I had even ordered the wheels. The chassis came out properly: four rubber tyres, a servo-steered Ackermann front axle, and a rear-wheel drive layout.

The remote was the part I was most proud of. Instead of using an off-the-shelf transmitter, I modelled a gamepad from scratch, 3D-printed the shell in two halves, fitted two analog joystick modules inside, and ran everything through an ESP32 WROOM using ESP-NOW. The latency was good. The control feel was actually decent.

What went wrong: I kept adding things. A 5A boost converter, an oversized 3500mAh LiPo, and a printed housing for every component. The real weight came from the motor itself, the MG996R metal-gear servo, the boost converter, and the stack of PLA casings I built around everything — not the electronics. The ESP32, buck converter, and DRV8876 barely register on a scale. At 565 g assembled, the motor had no performance headroom left. The lesson stuck — directly led to the small RC car, which came in at 101 g.

Build
Step 01
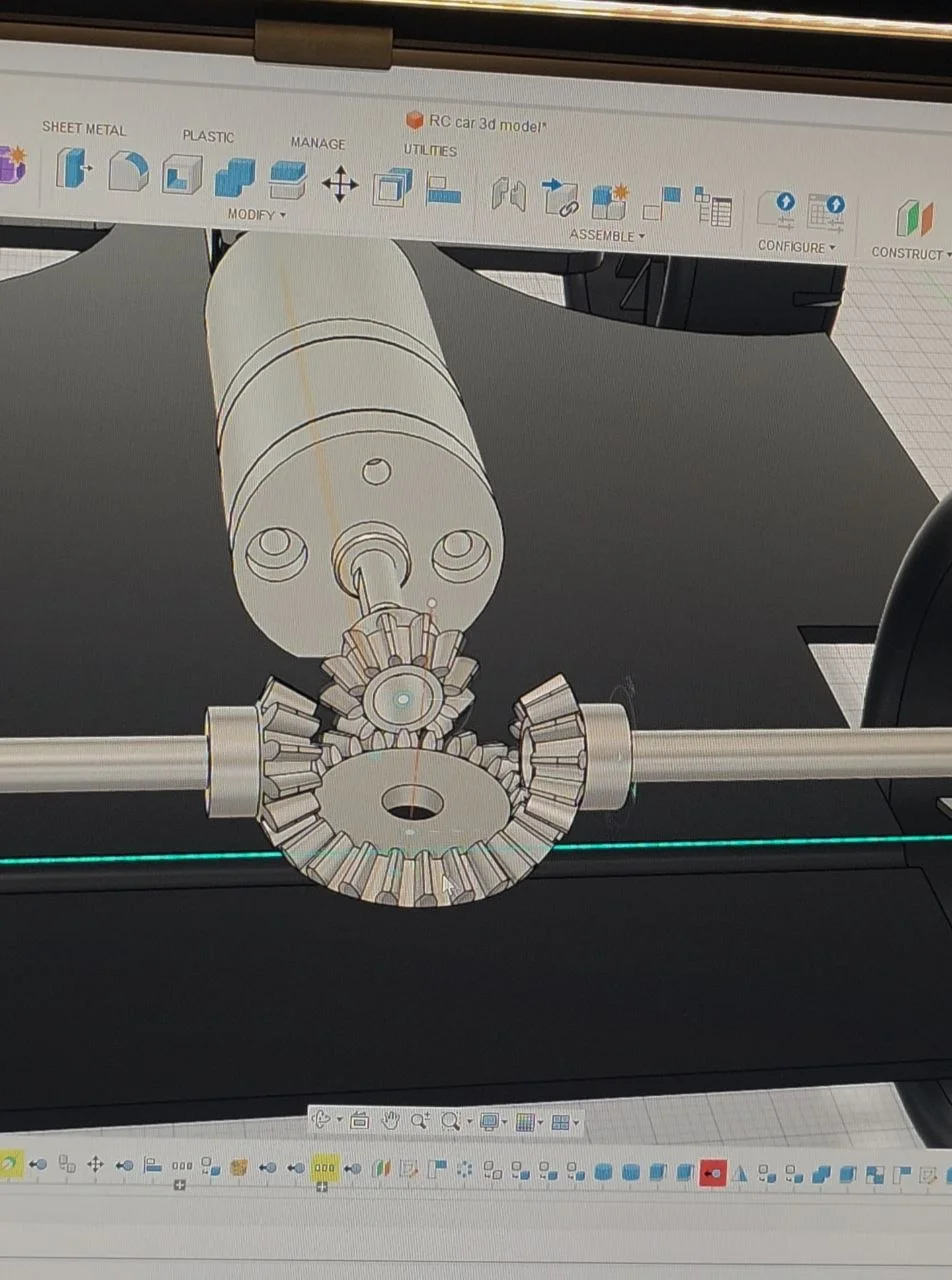
Chassis design in Fusion 360
Started with the wheel geometry — real rubber tyres with a proper tread pattern — and worked backwards to figure out the chassis dimensions. Modelled a working Ackermann steering linkage, front and rear axles, servo mount, and motor housing. Everything was parametric so I could adjust wheelbase without redrawing from scratch.
Differential gear assembly
Differential gear assembly — 3D-printed components
Step 02
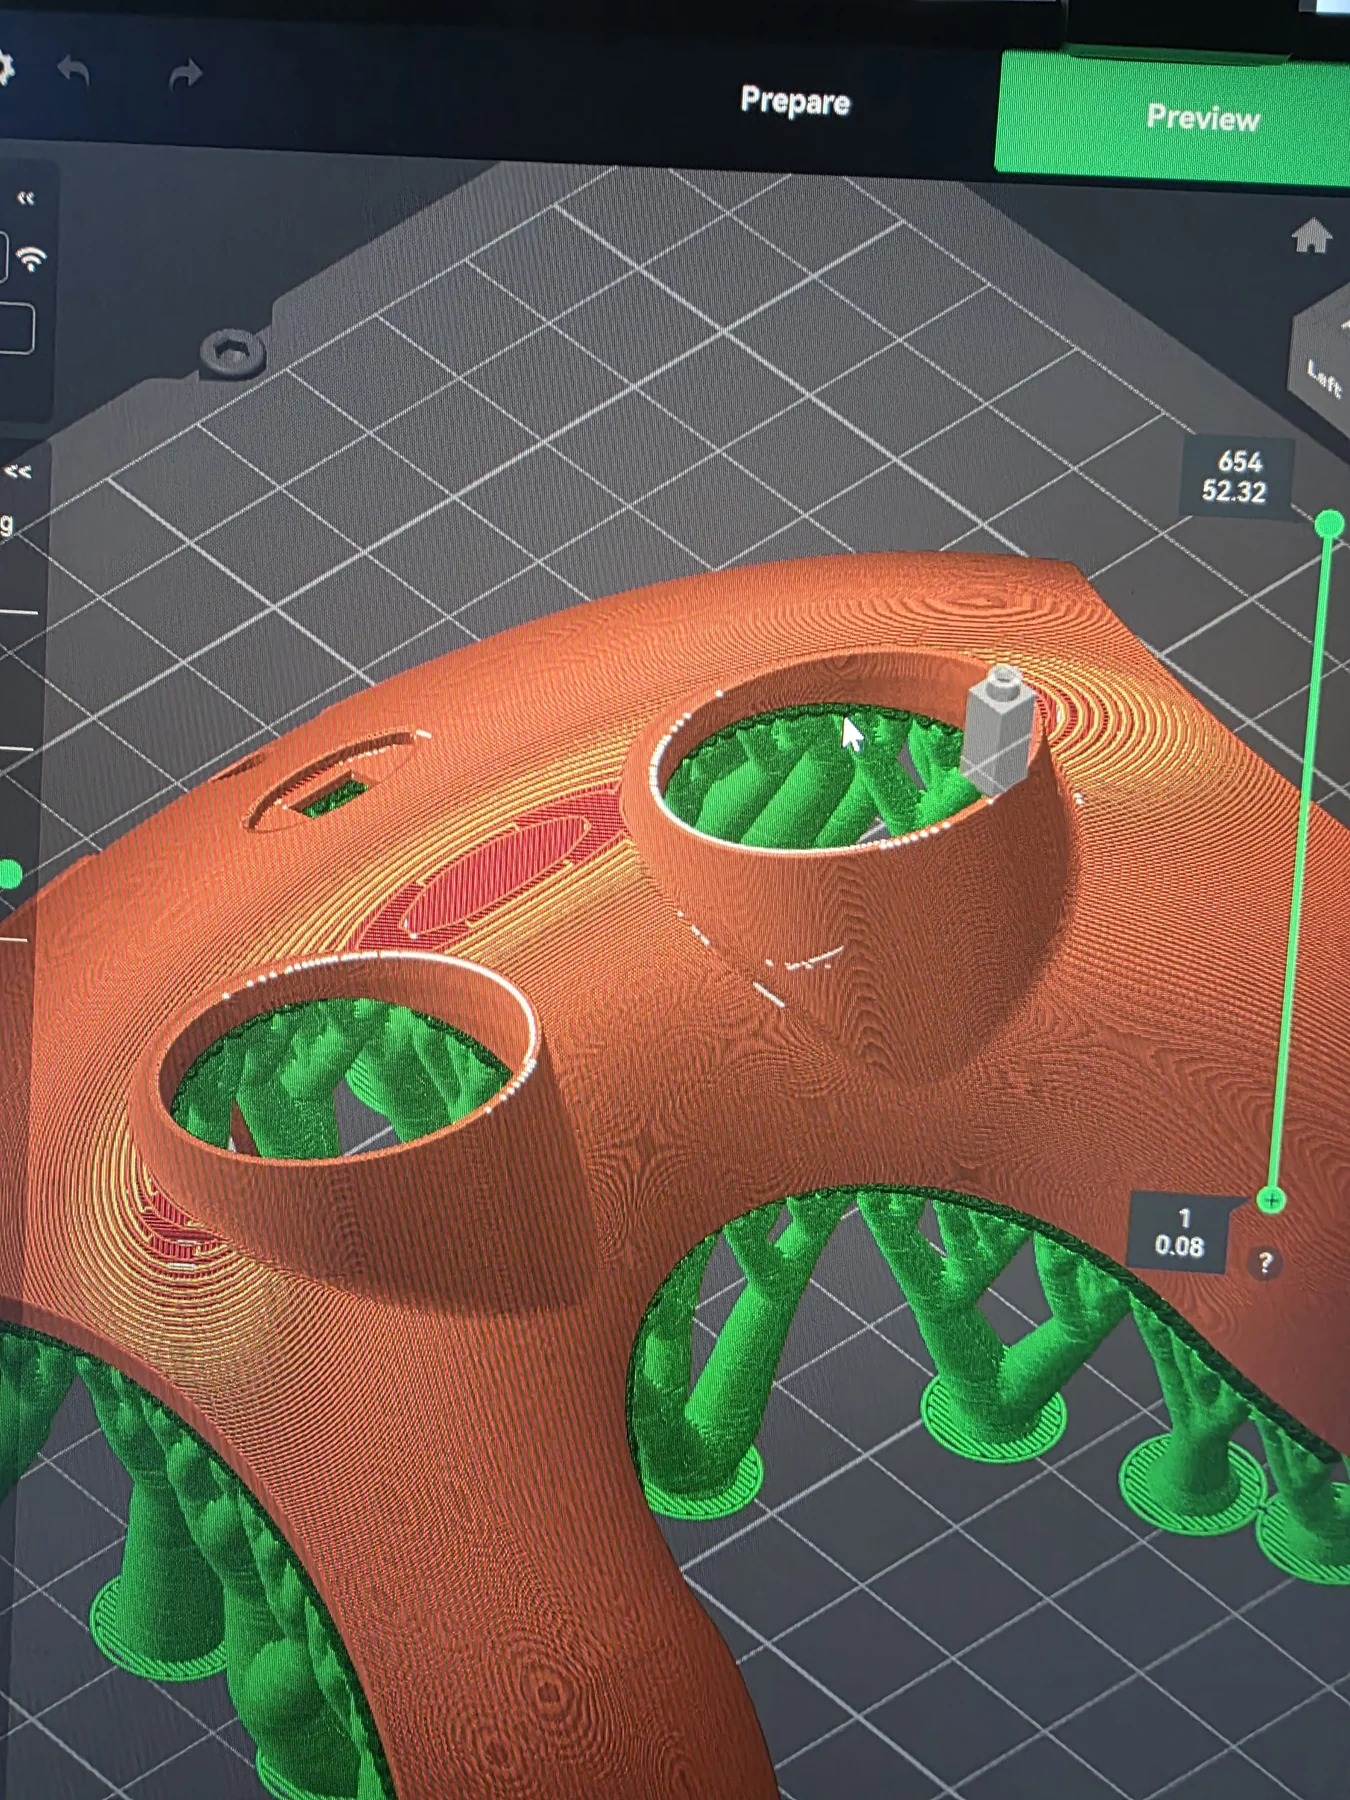
3D printing the chassis
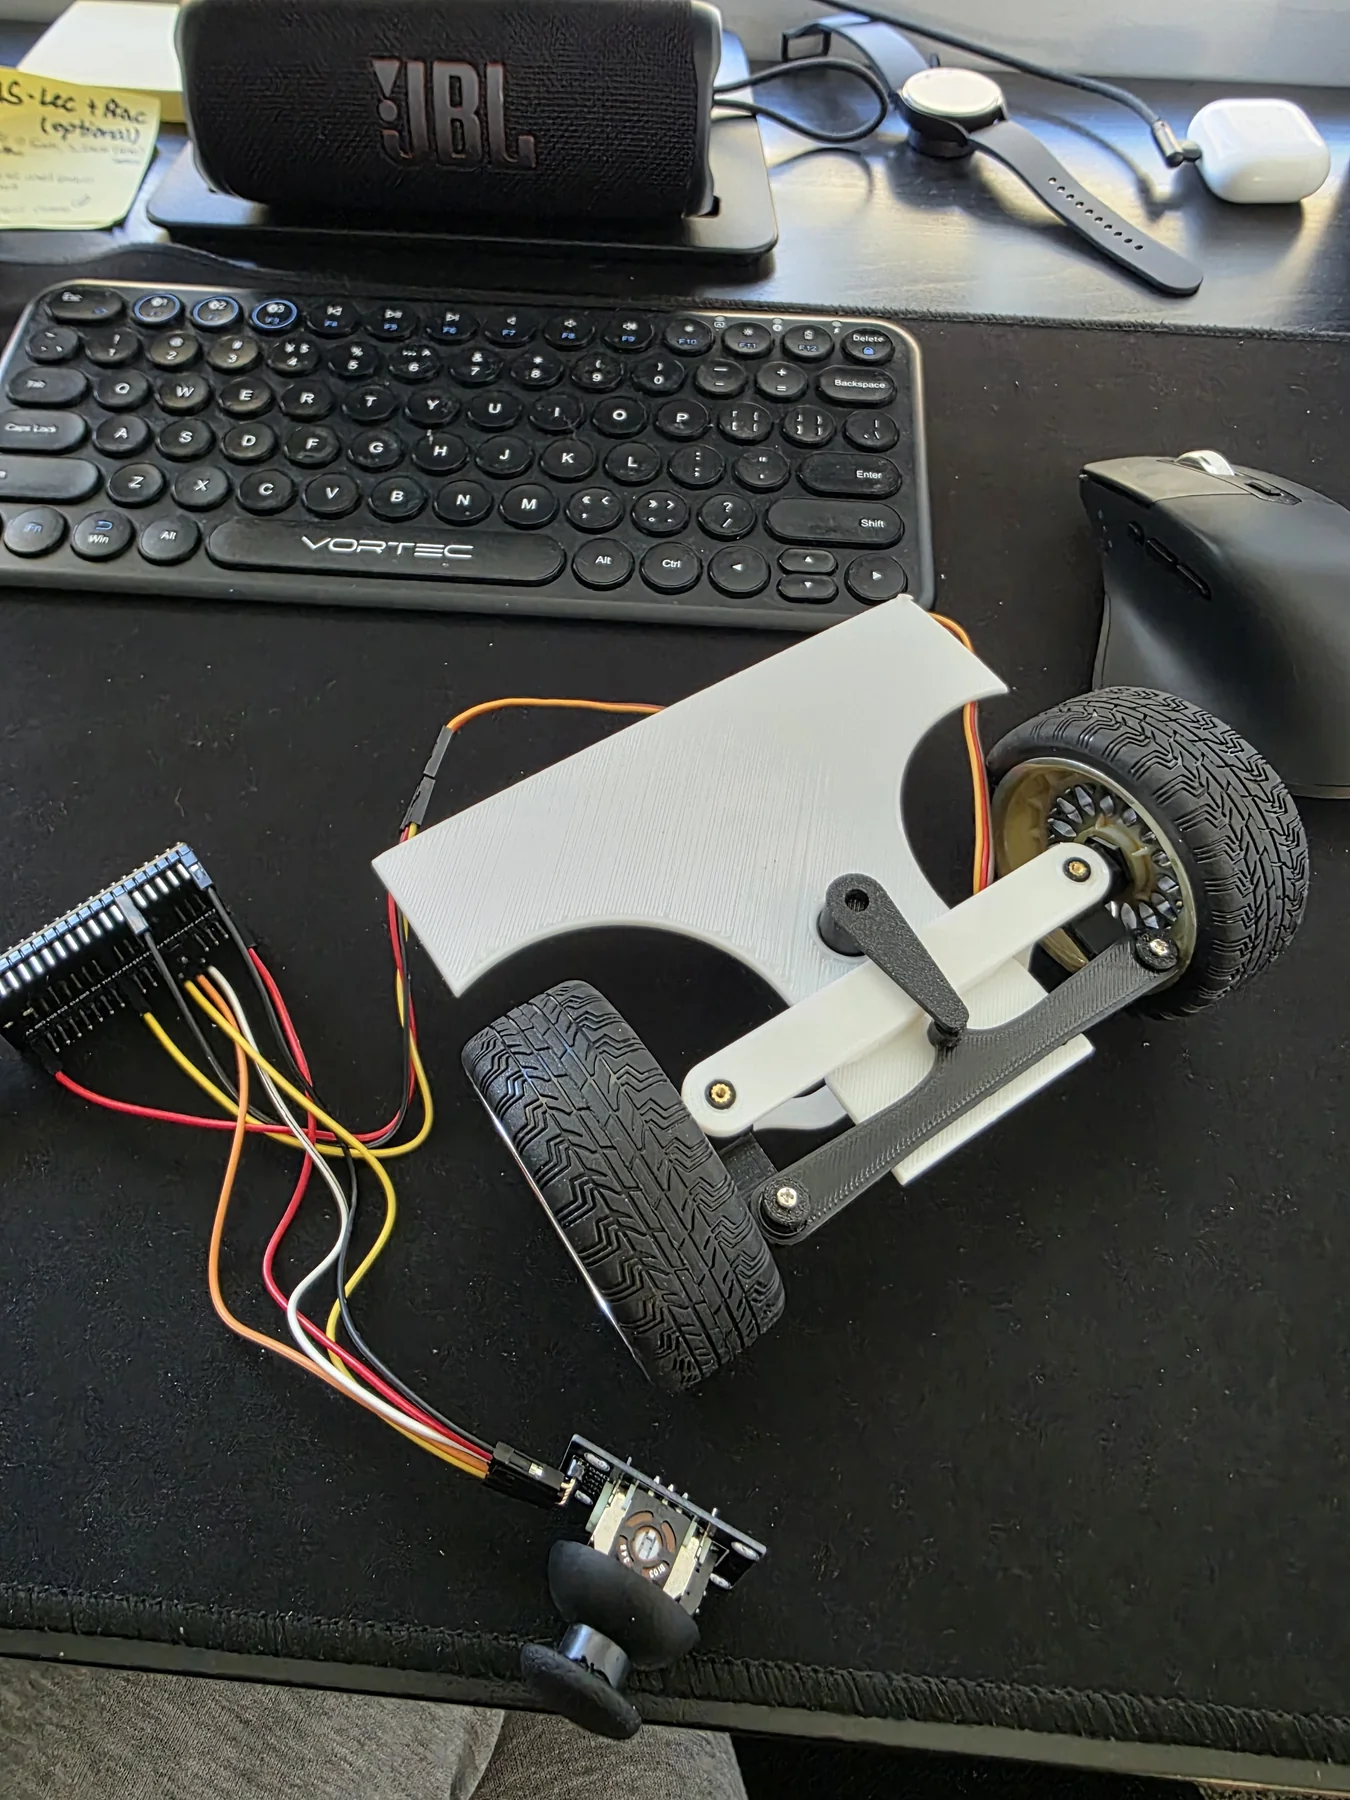
Printed in black PLA on a Creality printer. The main chassis plate, servo mount bracket, rear motor housing, and wheel hubs all came out cleanly. The Ackermann arms took a couple of iterations to get the right pivot geometry — first print was too flexible at the steering knuckle.
3D printed chassis with rubber tyres and servo
Chassis — servo, rubber tyres, rear drive motor
Step 03
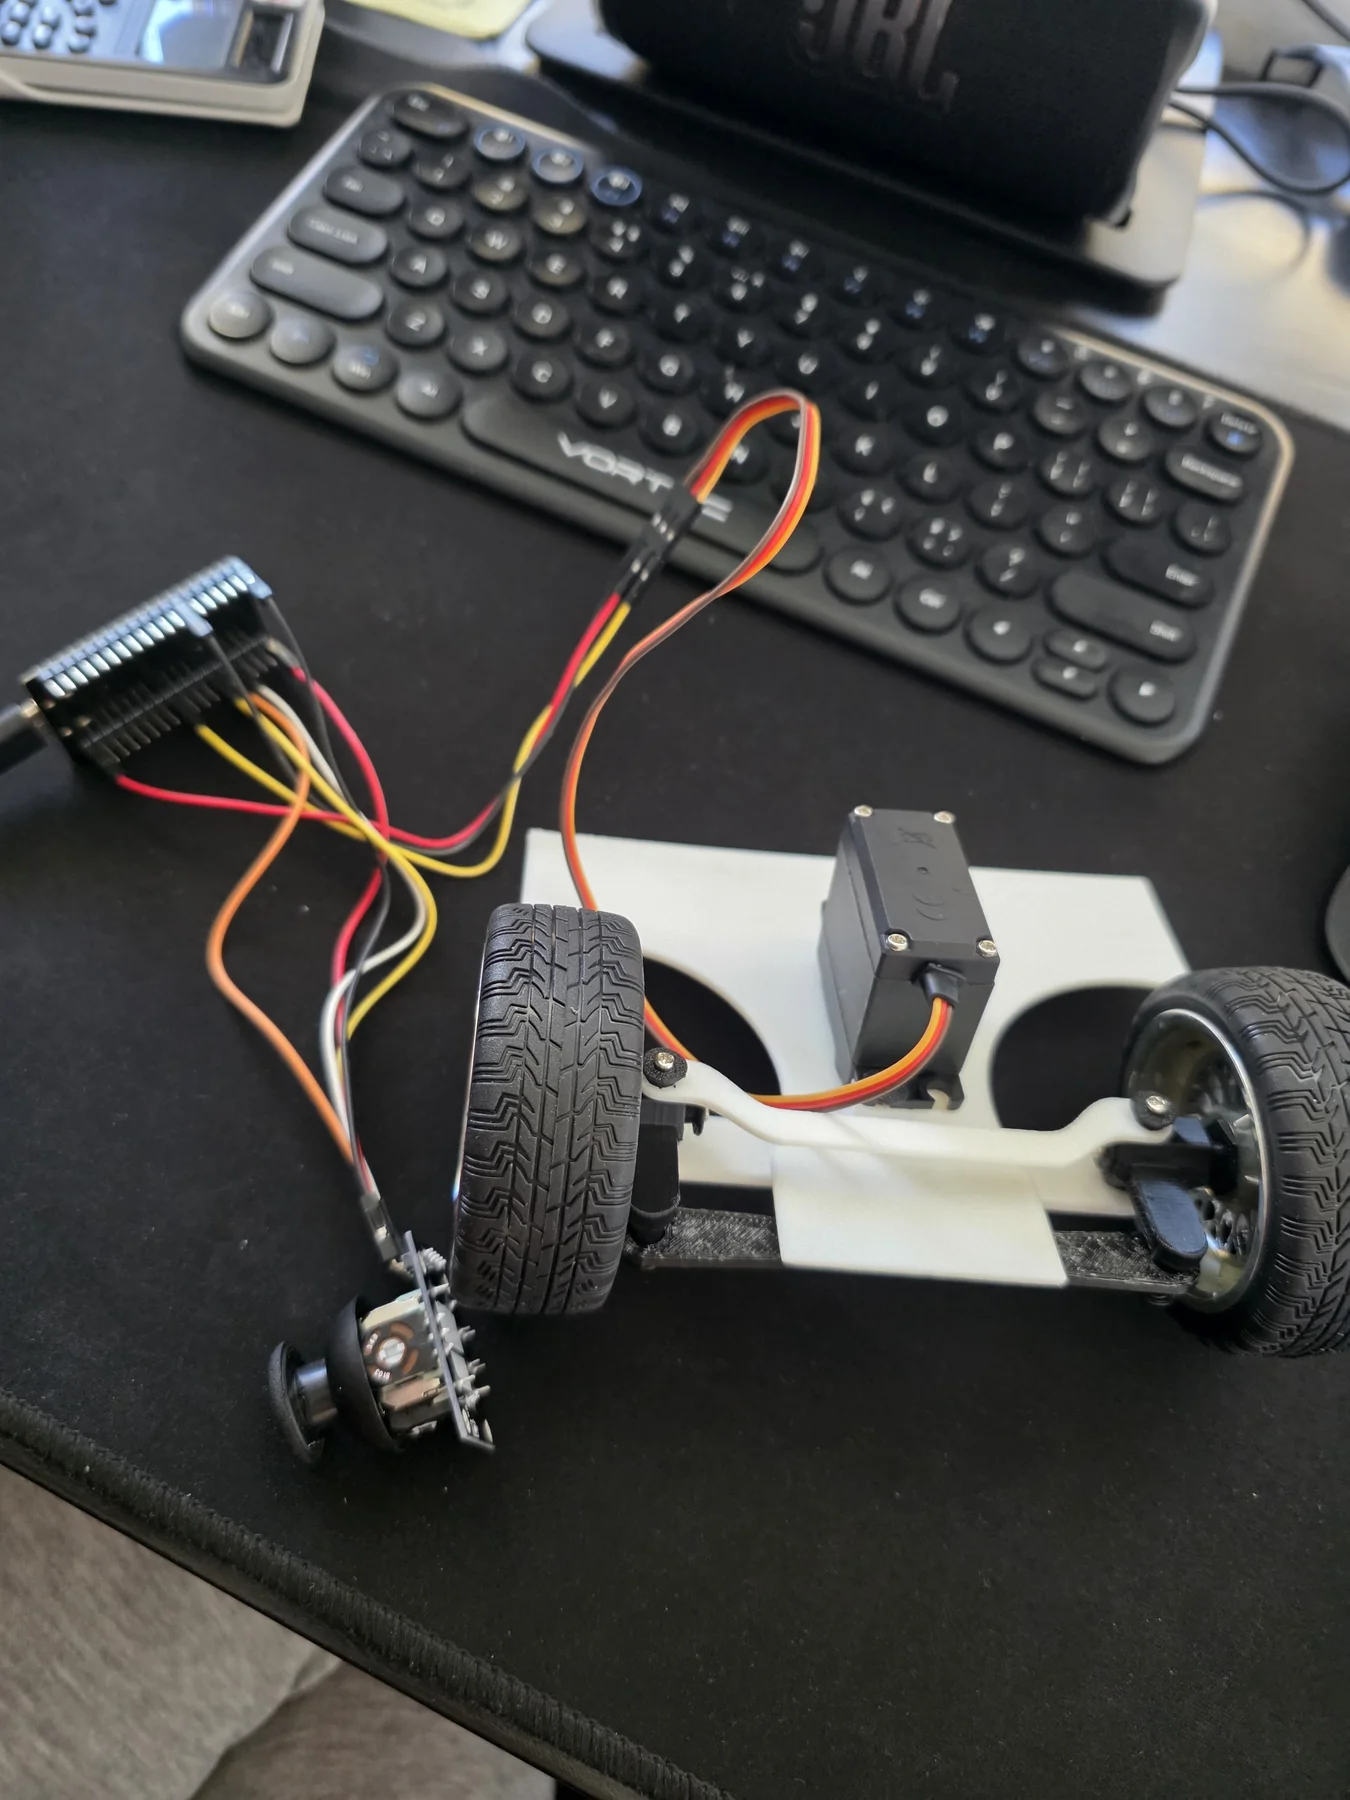
Electronics — ESP32 WROOM + DRV8876
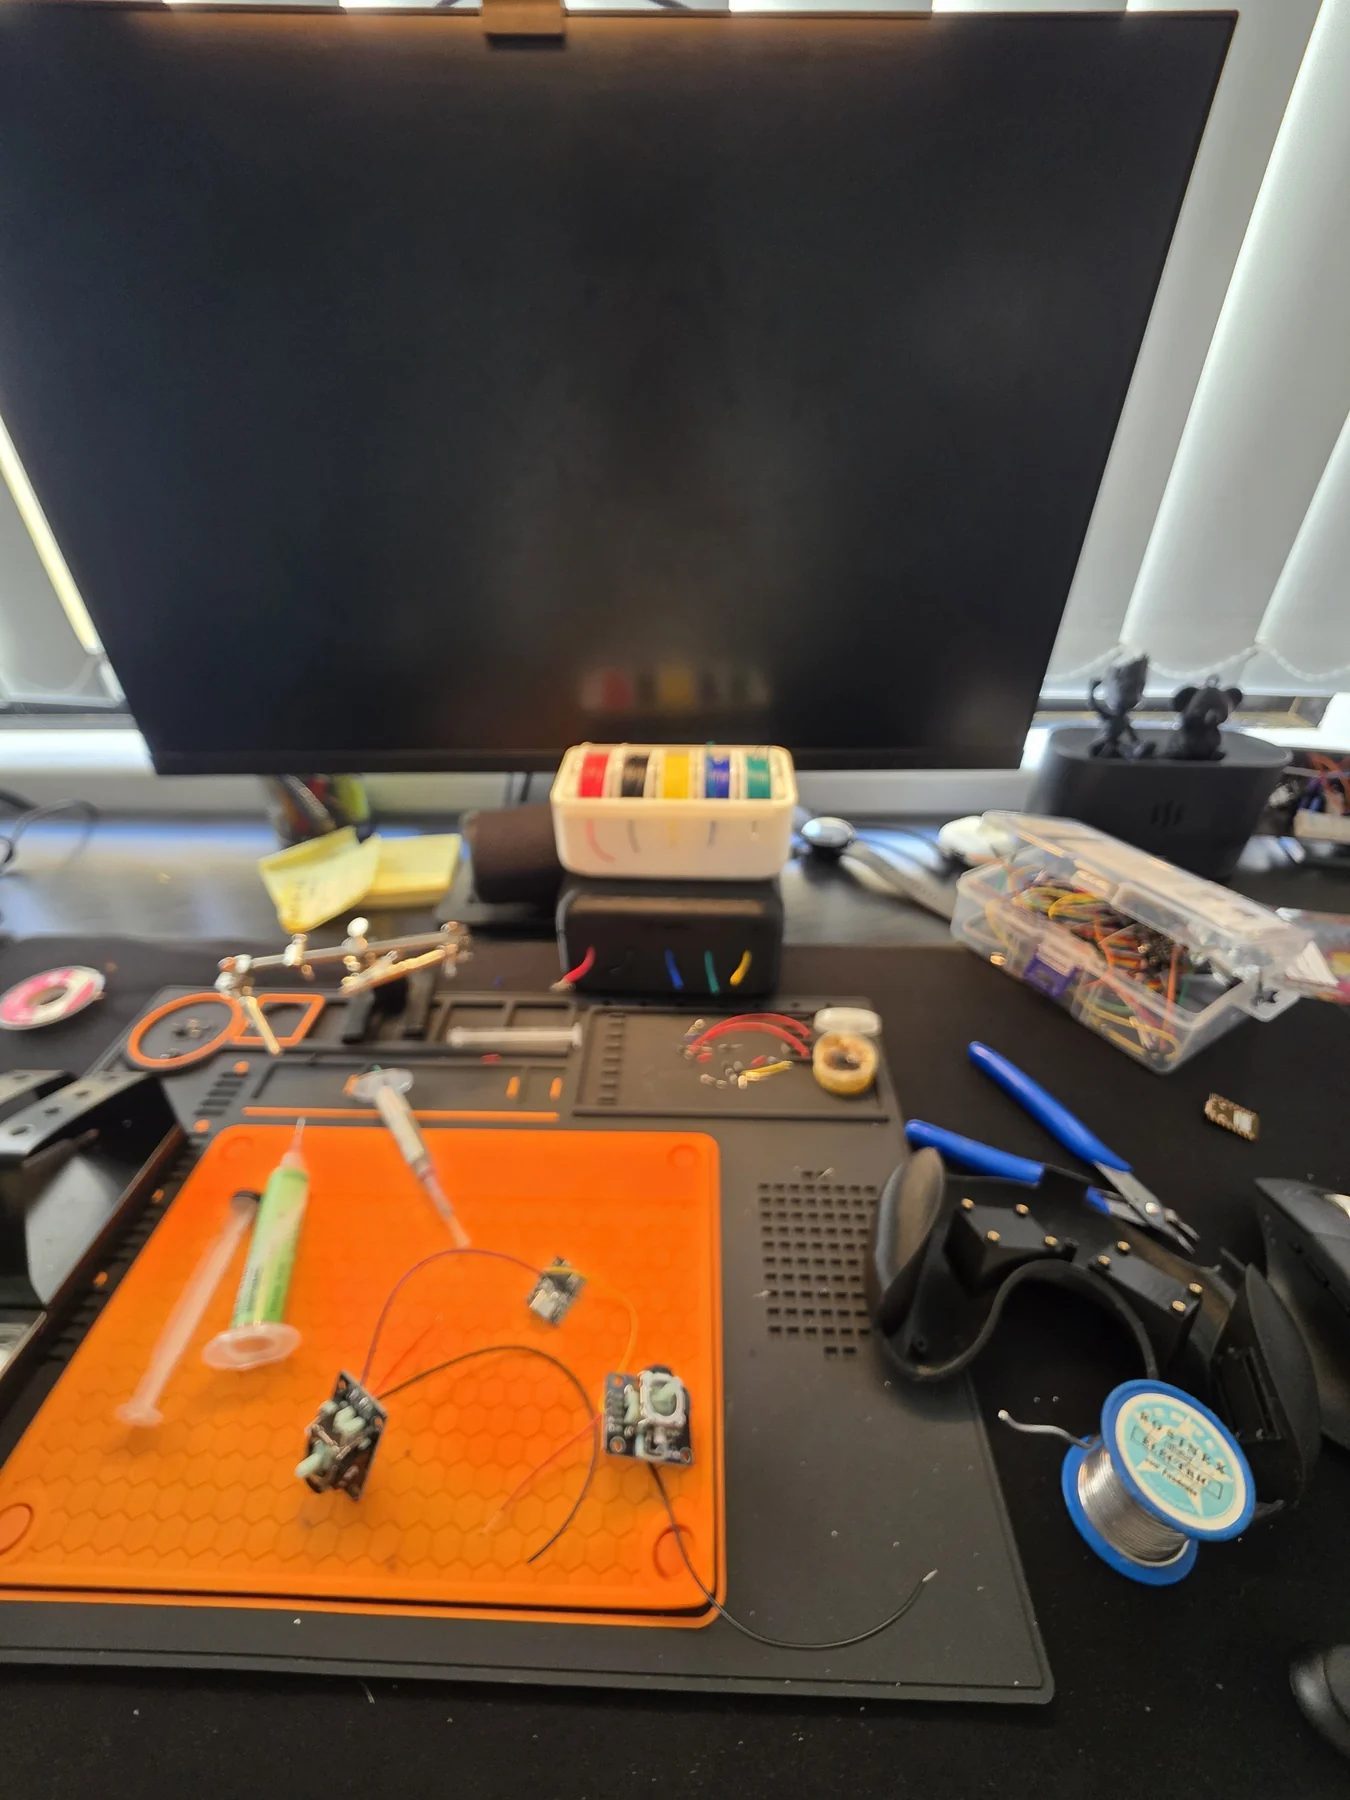
The car runs an ESP32 WROOM as the receiver. It listens for ESP-NOW packets from the remote and maps joystick values to PWM signals — Y-axis for throttle/reverse via 20 kHz 10-bit PWM on the DRV8876 (IN1/IN2 mode), X-axis to servo angle constrained to 60–115° to match the Ackermann geometry. Power came from a WLtoys 144001 2S 7.4V 3500mAh LiPo — a 3A buck converter stepped it down to 5V for the ESP32, while a 5A boost converter pushed 12V to the DC brushed gear motor ↗. That boost converter was the mistake — the motor and MG996R metal-gear servo were already the heavy parts; adding more power chain on top just compounded the weight. Written in Arduino C++ — full receiver and sender code available in the Remote section below.
Electronics on workbench during assembly
Electronics assembly — ESP32 WROOM, DRV8876, LiPo wiring
Step 04
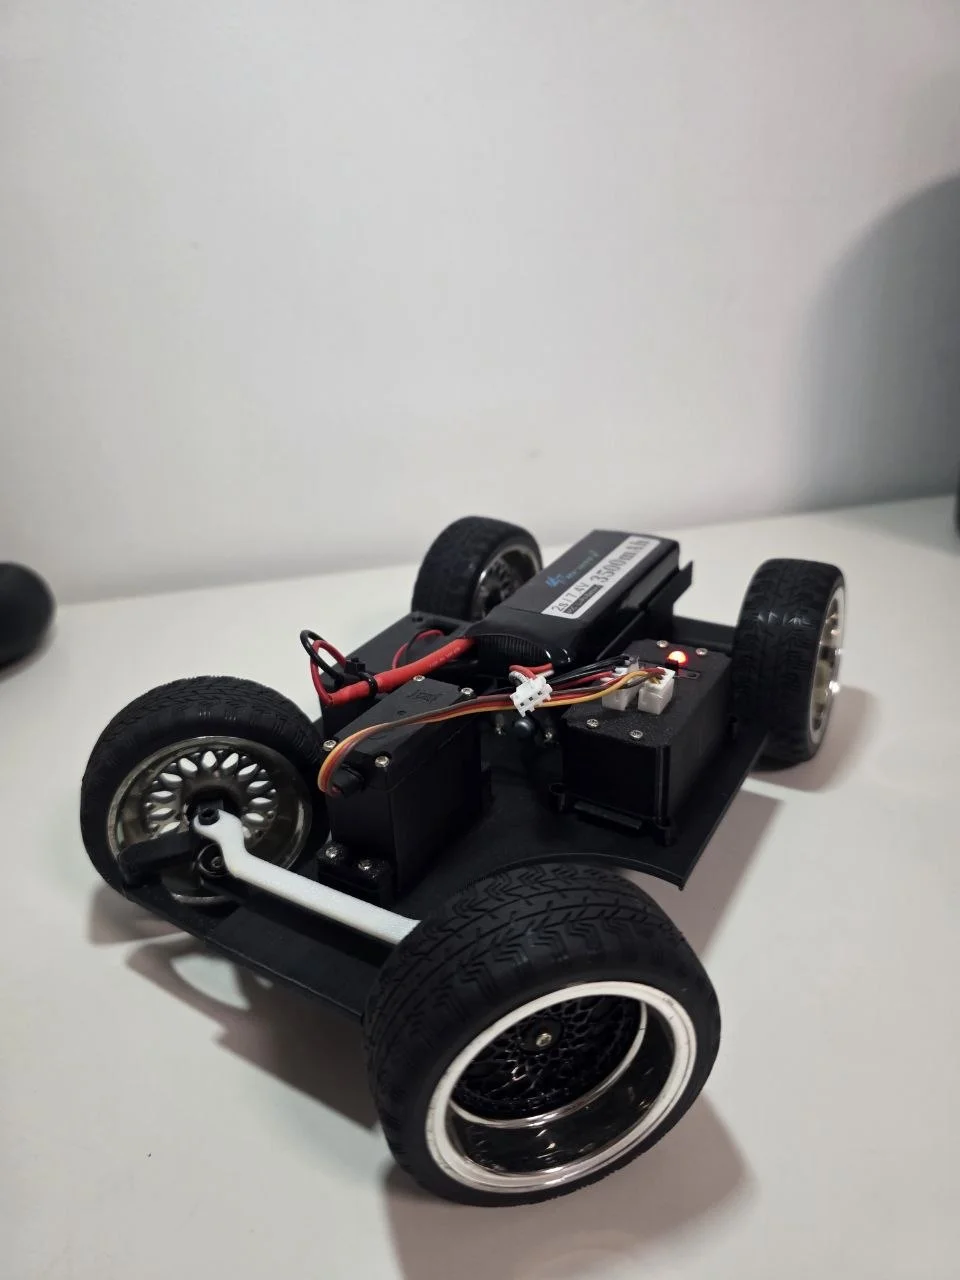
Assembly and first drive
Getting everything fitted into the chassis without shorting anything was the hardest part. With a buck converter, a boost converter, the DRV8876 driver, and the oversized LiPo, the electronics stack sat on top of the frame rather than inside it — raising the centre of mass. First drive test confirmed the car worked correctly: steering responsive, throttle smooth, ESP-NOW had no noticeable lag. But it was slow — way slower than expected for the motor spec. The weight was the culprit.
Fully assembled RC car — final build
Fully assembled — final build

Custom Remote

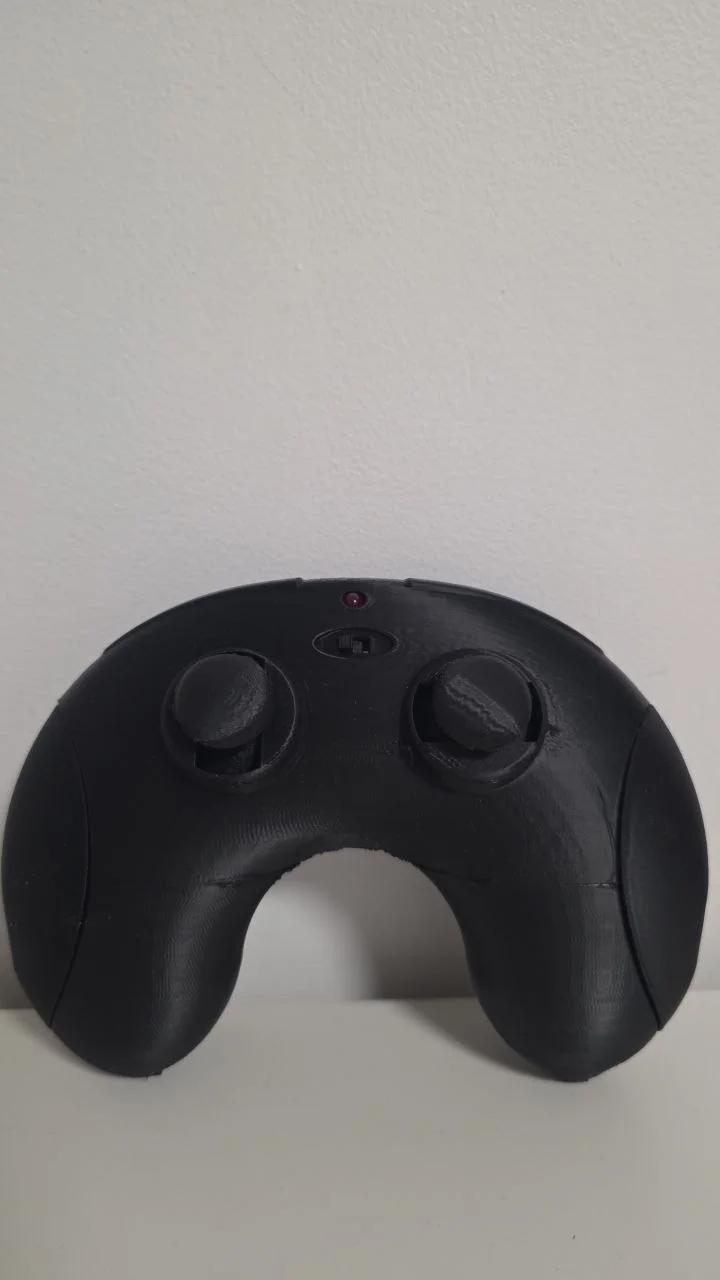
Custom 3D-printed remote with dual joysticks
Designed from scratch
Gamepad remote
Instead of using an off-the-shelf transmitter I modelled a full gamepad shell in Fusion 360. The body was split into two printable halves, designed to fit exactly around two KY-023 analog joystick modules and an ESP32 WROOM board. Printed in black PLA with hand-fit tolerances — no fasteners for the shell, just press-fit clips. The joystick thumb-caps are custom 3D-modelled covers that screw on and off, allowing the sticks to be swapped or adjusted without disassembling the remote.
  • Modelled in Fusion 360, printed on Creality
  • Dual KY-023 analog joystick modules
  • ESP32 WROOM transmitter
  • ESP-NOW protocol — no pairing, peer-to-peer MAC
  • 3.7V 18650 3000mAh 20C Li-ion cell, fits inside grip section
  • Screw-on/off 3D-printed joystick thumb-cap covers
ESP-NOW Protocol
ProtocolESP-NOW (IEEE 802.11 action frames)
Pairing methodHardcoded MAC address
Packet rate~50 Hz (20 ms loop)
Typical range~50 m line-of-sight
LatencyNo noticeable lag (not timed)
Power3.7V 18650 3000mAh 20C Li-ion in grip
Firmware

Written in Arduino C++ using the ESP-NOW API. The receiver maps joystick axes to 20 kHz 10-bit PWM on the DRV8876 (IN1/IN2 mode) and servo angle constrained to 60–115° for the Ackermann geometry. The sender reads GPIO34/35 with a 7-sample median filter and auto-calibrates joystick centres on power-up. Holding the BOOT button for 2 s triggers manual recalibration without a restart.

Videos

Steering mechanism — top view
Steering linkage — underside view
Steering test
Rear gear — drivetrain close-up
Drive test — run 1
Drive test — run 2

What I Learned

Lesson 01
Choose components for the job, not the spec sheet
The boost converter felt like a logical fix — more voltage, more torque, faster car. But that reasoning was backwards. The motor wasn't the bottleneck; the weight of everything around it was. Choosing the right component means identifying the actual constraint first. I needed to strip mass, not add a power chain.
Lesson 02
Weight kills performance faster than anything else
At 565 g this car weighed more than five times the v2 at 101 g — same wheel size, same concept, dramatically different result. The MG996R alone weighs ~55 g (six times an SG90), the motor adds more, and every printed casing compounds it. Mass has to be accelerated by the same motor. Strip the weight, keep the essentials, and the performance gap is immediate.
Lesson 03
Custom remote was worth it
The most complex part of the project was also the most satisfying — building a controller that actually fits your hand, with controls where you want them, communicating the way you designed it. ESP-NOW is fast enough for RC use and far simpler to implement than a radio module with its own protocol.
Large RC Car — v1
MCUESP32 WROOM
Motor driverDRV8876
Chassis3D-printed PLA, full size
SteeringAckermann servo
BatteryWLtoys 144001 2S 7.4V 3500mAh (oversized)
Power modules3A buck + 5A boost (unnecessary)
RemoteCustom 3D-printed gamepad
Weight565 g assembled
SpeedVery slow (overweight)
Small RC Car — v2 (result)
MCUESP32-C3 XIAO
Motor driverTB6612FNG
Chassis3D-printed, compact
SteeringSimplified servo mount
Battery3.7V LiPo — direct to TB6612FNG VM
Power modulesNot needed — integrated ESP32 battery input
RemoteBreadboard C3 SuperMini
Weight101 g assembled
SpeedNoticeably faster

What came next

Version 2
ESP32 Mini RC Car
Everything learned from v1, stripped back to what actually mattered. Smaller driver chip, lighter chassis, breadboard sender instead of a custom remote — faster result.
→
← Exhaust Controller ⌂ Portfolio Mini RC Car →