PCB Design Project — KiCad 9

ESP32-S3 Development
Module

Custom 4-Layer PCB  /  KiCad 9  /  JLCPCB Manufacturing  /  04/2026
ESP32-S3-MINI-1-N8 USB-C · USB2.0 4-Layer · 1.6mm DRC PASS · 0 Errors ENS210 Temp/Humidity WS2812B RGB LED
JLCPCB JLC04161H-3313 IPC-2141 Impedance Analysed
📦 KiCad Project Files → 📐 Schematic PDF → 📄 ESP32-S3 Datasheet →
Result Designed a 4-layer ESP32-S3 dev board in KiCad 9 — USB-C, ENS210 sensor, WS2812B RGB LED, impedance-controlled USB traces — 0 DRC errors, manufactured at JLCPCB.
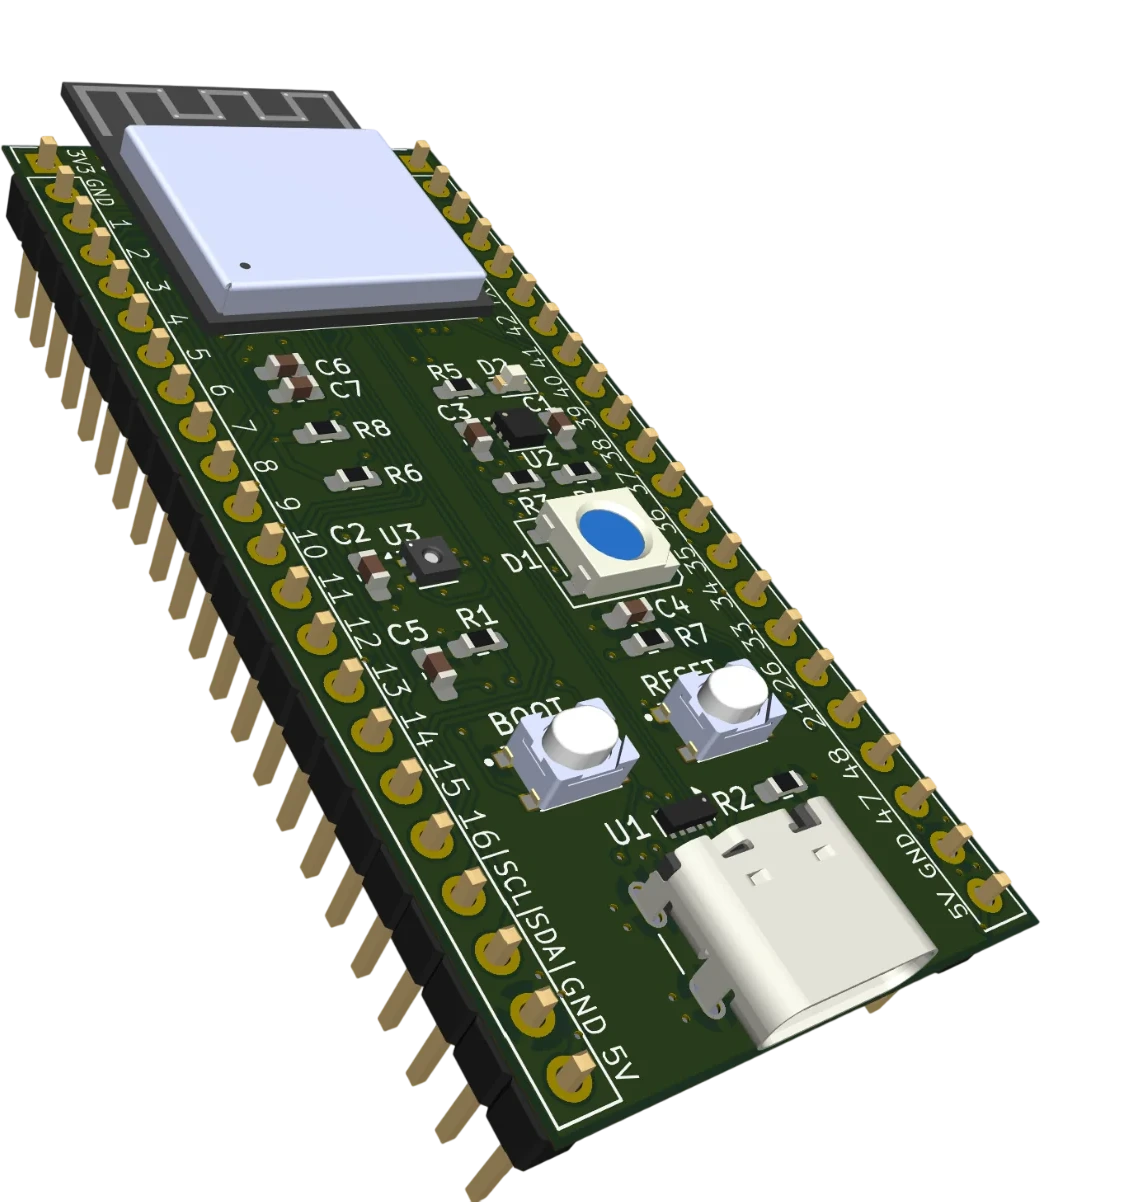
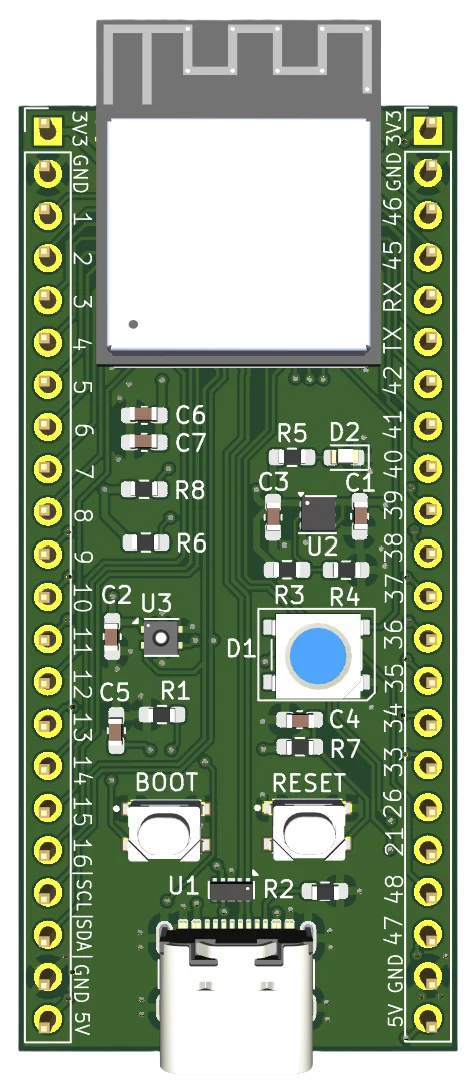
ESP32-S3 Custom PCB — 3D render

I wanted a dev board I'd actually designed myself — not another module I just plugged in. Went 4-layer in KiCad because a solid GND plane directly under the RF module matters for EMI, and I needed impedance control for the USB traces — neither of those work reliably on 2 layers. The USB-C CC resistors nearly broke me — turns out without 5.1 kΩ on both CC pins, USB-C chargers simply don't deliver power. Boards came back from JLCPCB and actually worked first try — USB enumerated immediately and the temperature sensor responded on the first I²C scan — which honestly surprised me.

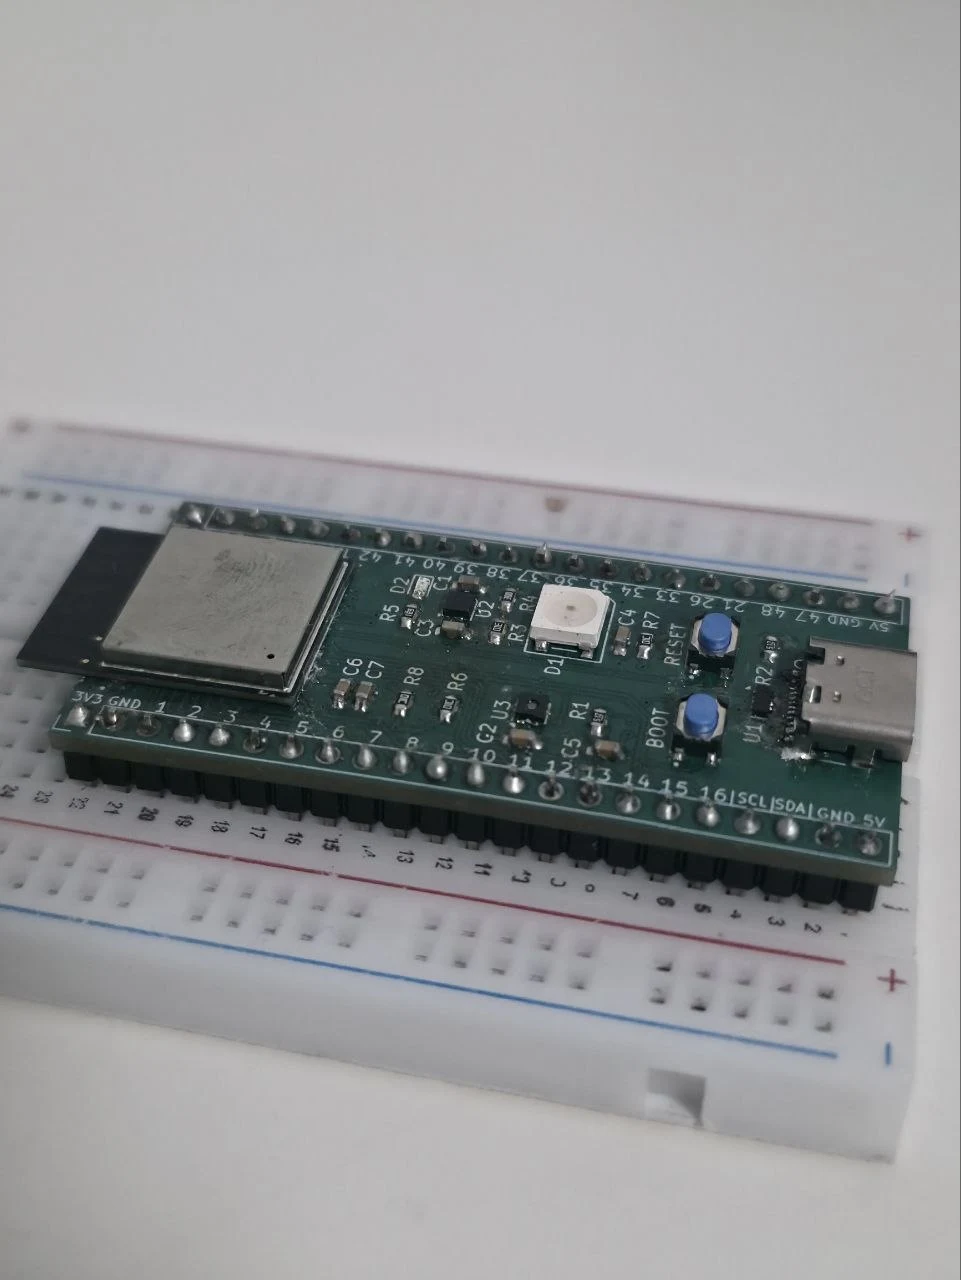
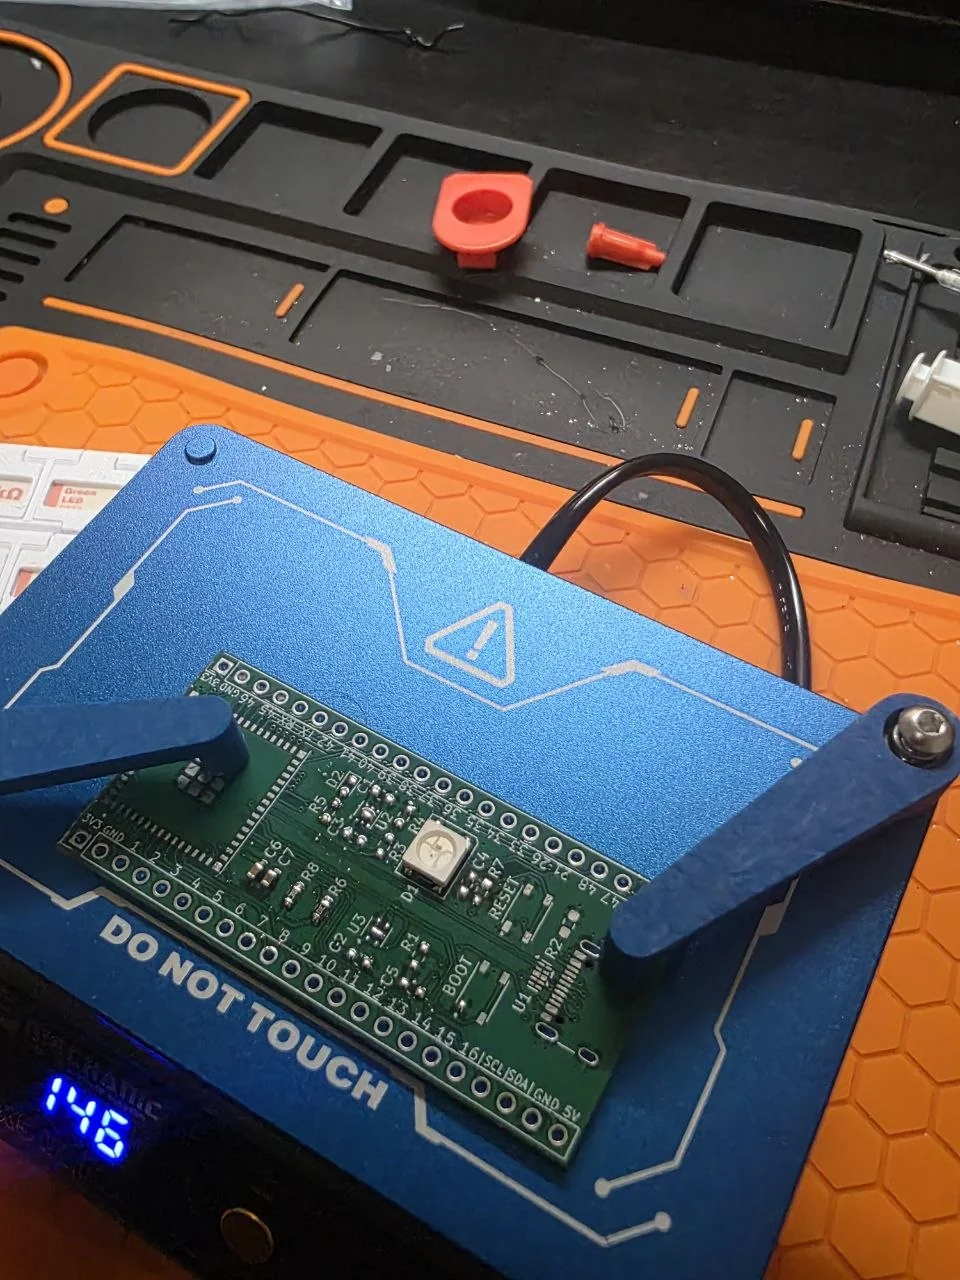
Assembled ESP32-S3 dev board — front view
Assembled dev board — front view
Assembled ESP32-S3 dev board — front view
Assembled ESP32-S3 dev board
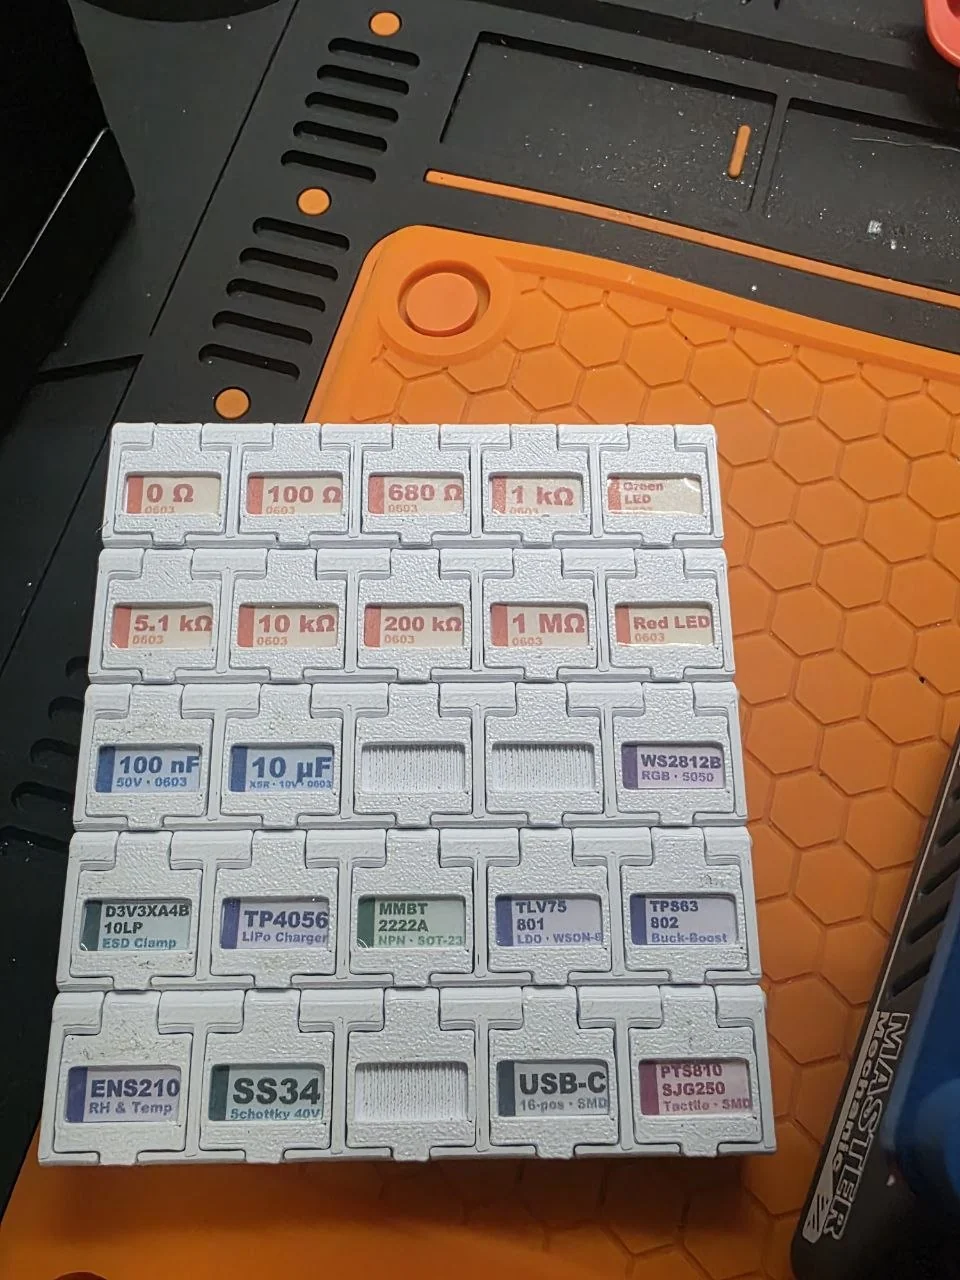
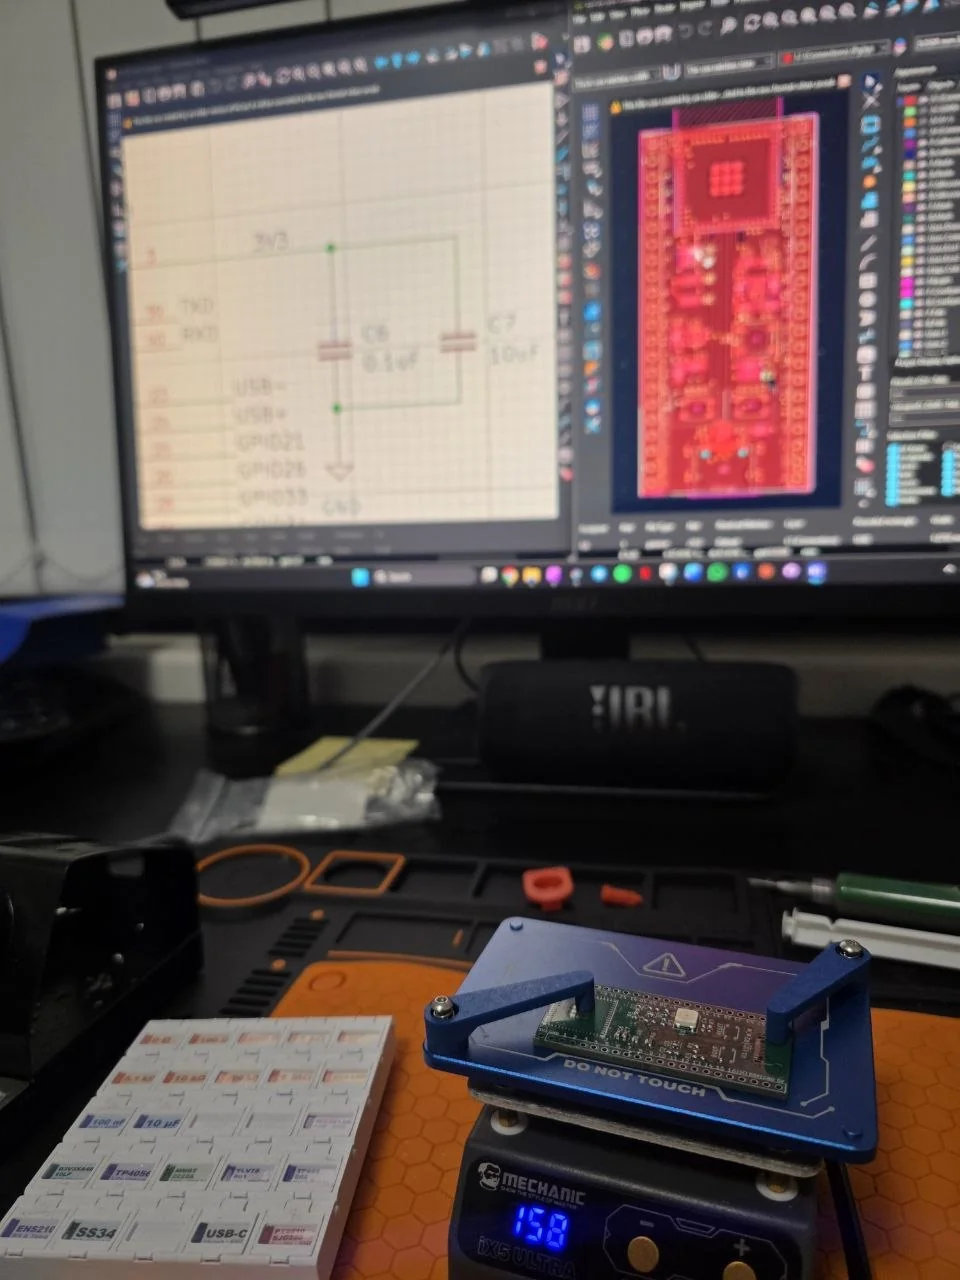
Labelled SMD parts for the ESP32-S3 dev board build
ESP32-S3 dev board on a reflow hotplate
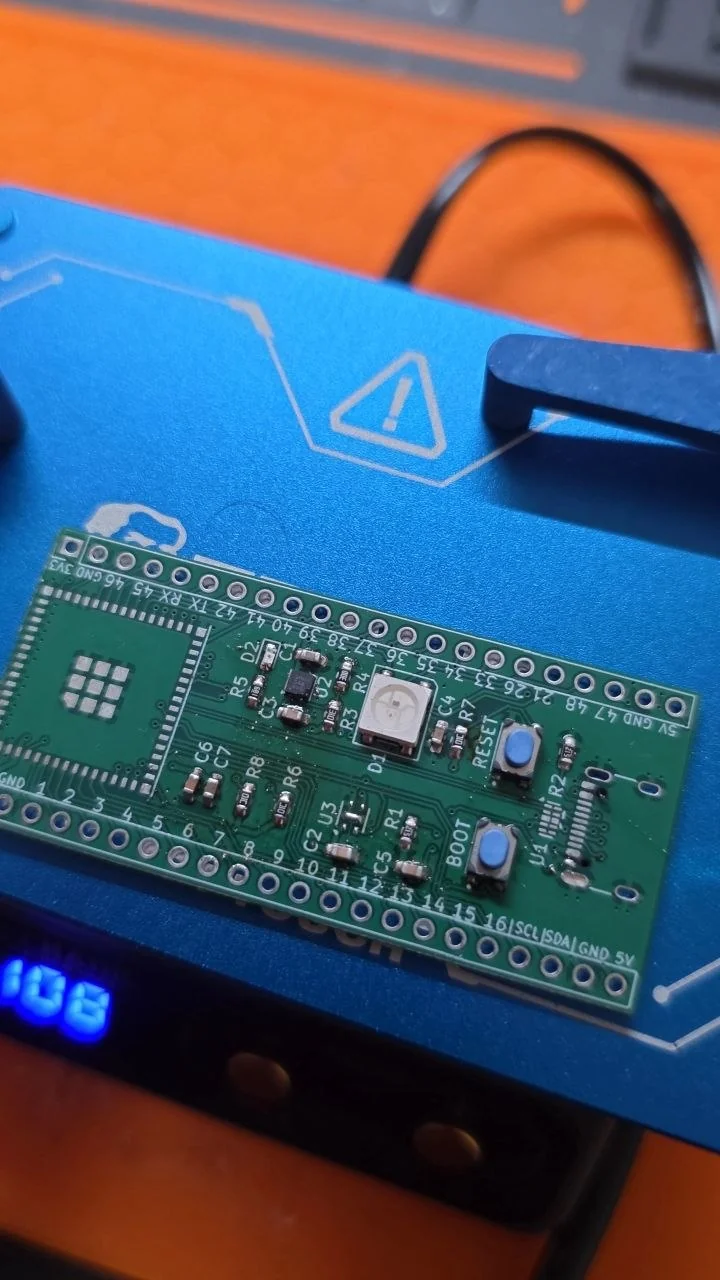
ESP32-S3 dev board — component side
ESP32-S3 dev board — component side close-up
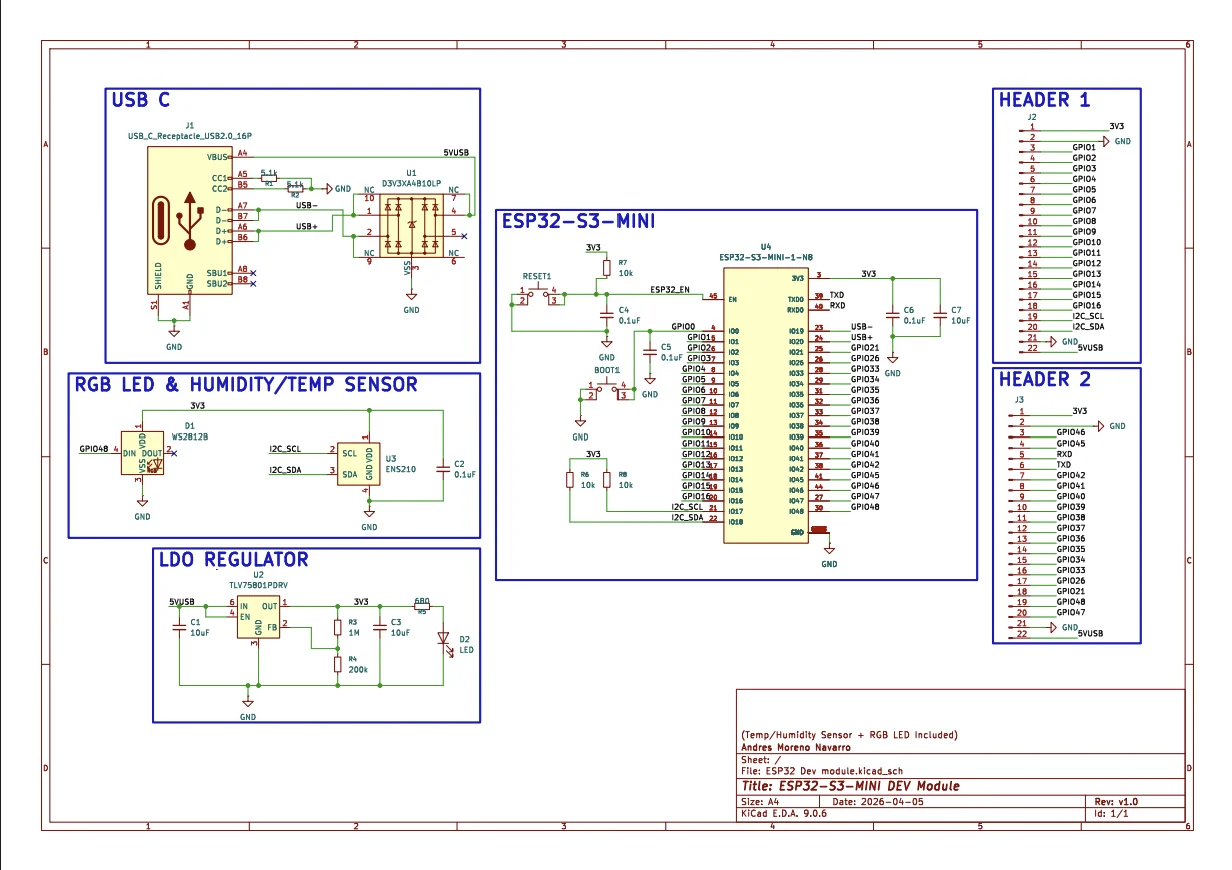
Full ESP32-S3 schematic — KiCad 9
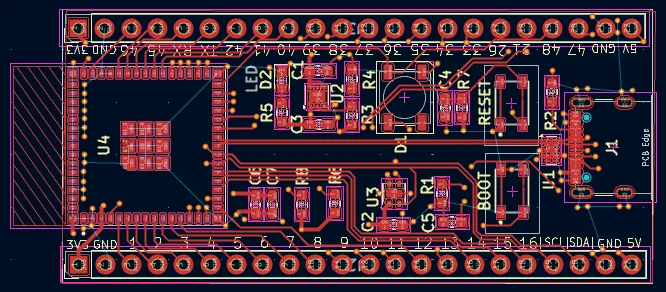
KiCad PCB editor — component placement, fig. 1
KiCad PCB editor — component placement, second view
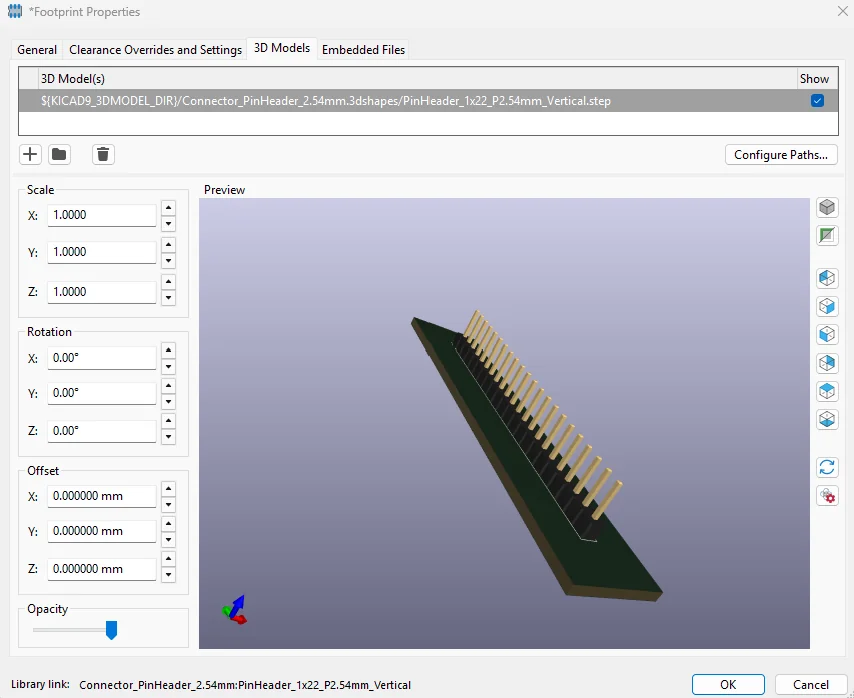
KiCad 3D view — STEP models placed and aligned
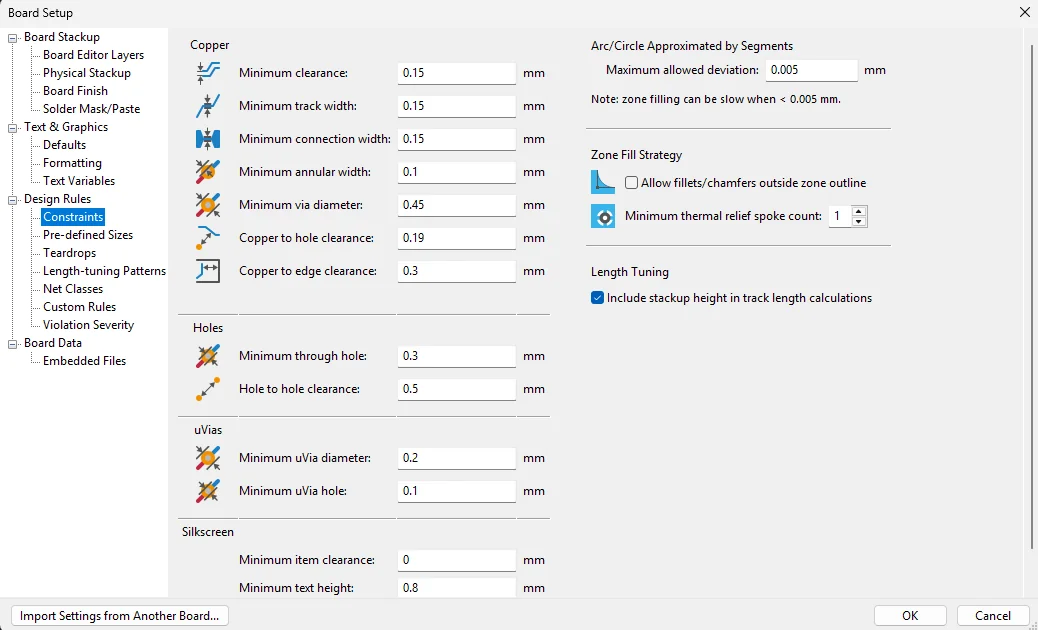
KiCad design rules — JLCPCB manufacturing constraints
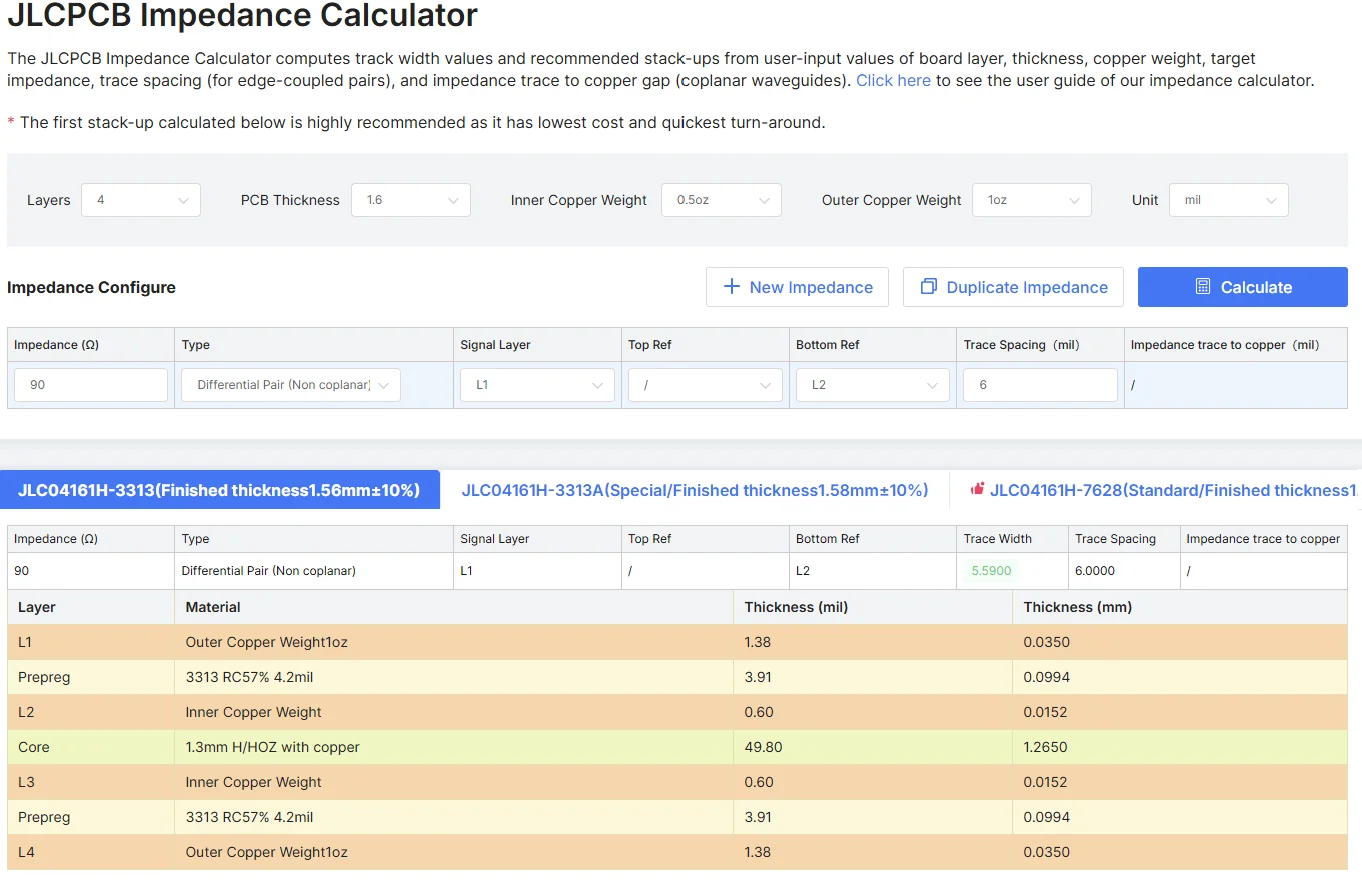
IPC-2141 impedance calculation — USB differential pair
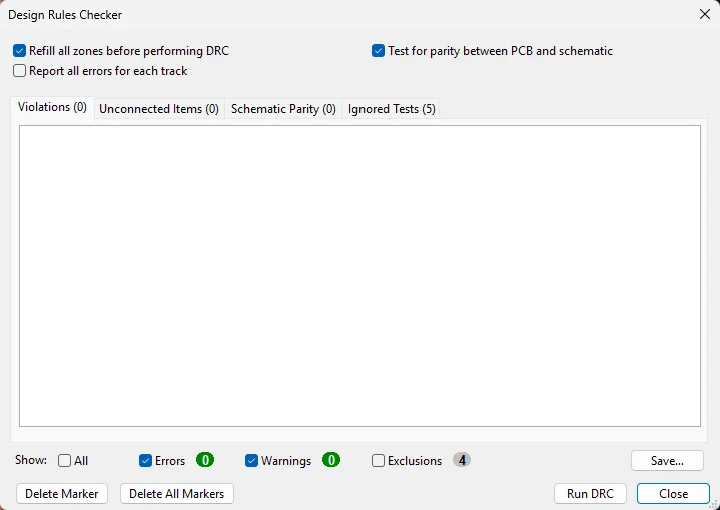
KiCad DRC — 0 errors, post-route final check
Key Components
ESP32-S3-MINI
Native USB
TLV75801PDRV
USB-C
WS2812B LED
ENS210 Sensor
4-Layer PCB
Build Progress
✓
Schematic
✓
PCB Layout
✓
DRC Pass
✓
Fabrication
✓
Assembly
✓
Testing
What I Learned
  • Impedance control isn't just about the traces — you have to pick a stack-up the fab actually supports. The JLCPCB JLC04161H-3313 stackup publishes its prepreg parameters, so calculating the 90Ω differential width for USB D± was straightforward. If I'd picked a stackup without published Dk values, I'd have had to guess.
  • USB-C CC resistors. Everyone mentions them, nobody explains why until you're sitting with a charger that won't power your board. 5.1 kΩ on both CC pins = power. Without them = nothing. Two days of my life went into figuring this out.
  • I had a floating GND island in my first layout that caused intermittent RF glitches under load. GND stitching vias every ~2 mm fixed it — now I add them by habit before I even think about routing signals.
4 layers
PCB Stack-up
3.3 V
Supply Rail
0 Errors
DRC Result
26 parts
Bill of Materials
Schematic, layout decisions, and DRC walkthrough below ↓

Project Overview

PCB Layers
4
Signal / GND / PWR / Signal
Form Factor
~57mm
× 26mm compact module
Components
26
Unique references
DRC Errors
0
0 violations

This is a custom development board built around the ESP32-S3-MINI-1-N8 — Espressif's compact Wi-Fi and Bluetooth 5.0 module. The goal was straightforward: design something equivalent to a commercial dev board from scratch, understanding every part of it. It breaks out all usable GPIOs, adds an on-board temperature and humidity sensor, an addressable RGB LED, and powers from a single USB-C cable or 5V rail. 

The entire design was done in KiCad 9, from schematic capture through to manufacturing-ready Gerber files, targeting JLCPCB's 4-layer process with the JLC04161H-3313 stackup. The USB differential pair was analysed for impedance using IPC-2141 calculations matched to that specific stackup, and all design rules were verified clean before ordering.

This was completed as an independent project during second year Electrical and Electronic Engineering at the University of Western Australia. It was also my first multi-layer PCB — prior hands-on work had been breadboards and single-layer designs, so KiCad, manufacturing tolerances, and impedance-controlled routing were all learned from scratch alongside the design.

⚠ Note: The 3V3 header pin is a regulated output only — do not apply external voltage to it. The TLV75801 LDO has no back-drive protection; powering through 3V3 with USB disconnected will damage the IC. Power the board via USB-C only. See Rev 2 for a planned fix.
At a Glance
TypePersonal project
My roleSolo: schematic, layout, hand assembly, bring-up
CodeBring-up test sketches written with AI coding help
TimelineApr – May 2026
Skills4-layer PCB design · impedance control · SMD reflow · board bring-up
ToolsKiCad 9 · JLCPCB · hotplate reflow · Arduino IDE
StatusWorking · now the main controller in my Bip robot
Built On (Credits)
ModuleEspressif ESP32-S3-MINI-1-N8
PCB fabricationJLCPCB (JLC04161H-3313 stack-up)
Pin dataESP32-S3-MINI-1 datasheet v1.2
Test libraryAdafruit NeoPixel (LED test)
My workEverything on the board: circuit, layout, assembly, testing

GPIO Pinout Reference

A complete pinout reference for both headers is available below. Every pin is listed with its GPIO number and all alternate functions — ADC, touch, RTC, UART, SPI, JTAG, and I²C — verified against the ESP32-S3-MINI-1 Datasheet v1.2. Strapping pins (GPIO45, GPIO46) are clearly flagged since they affect boot behaviour and should be treated with care in your own designs.

Full interactive pinout reference with color-coded function tags and connector lines to each pin pad.

📌 Open Full Pinout Reference →
Left Header (J2) — 22 pins
3V3, GNDPower rails
GPIO1–10ADC1 + Touch + RTC
GPIO11–14ADC2 + Touch + RTC
GPIO15–16ADC2 + RTC + 32kHz
GPIO17 (SCL)I²C — ENS210
GPIO18 (SDA)I²C — ENS210
GND, 5VGround + USB VBUS
Right Header (J3) — 22 pins
3V3, GNDPower rails
GPIO45, GPIO46⚠ Strapping pins
GPIO43 (TX), GPIO44 (RX)UART0
GPIO39–42JTAG TCK/TDO/TDI/TMS
GPIO33–38FSPI / SPI2
GPIO48On-board RGB LED
GND, 5VGround + USB VBUS

Bill of Materials

ReferencePart NumberDescriptionQtyNotes
Microcontroller
U4ESP32-S3-MINI-1-N8Main MCU — Wi-Fi / BT5.0 / 8MB Flash1GPIO19/20 USB D±, not broken out to headers.
Power
U2TLV75801PDRVR800mA LDO Regulator — 5V → 3.3V1WSON-6. RθJA = 80.3°C/W. Thermal pad to GND.
R3, R41MΩ / 200kΩLDO Output Voltage Setting2Feedback divider — sets TLV75801 output to 3.3V.
USB & Protection
J1USB4105-GF-AUSB-C Receptacle — 16P Top Mount1CC1/CC2 pulled to GND via 5.1kΩ — signals USB device mode to host.
U1D3V3XA4B10LP4-line USB TVS ESD protection1UDFN-10. Protects VBUS, D+, D−.
R1, R2RC0603FR-075K1L5.1kΩ USB-C CC Resistors2Signals UFP (device) mode to USB host.
Sensors & Indicators
U3ENS210-LQFMTemperature & Humidity Sensor — I²C1QFN-4. SCL→GPIO17, SDA→GPIO18.
D1WS2812BAddressable RGB LED — PLCC41GPIO48 data line. 3.3V powered — below WS2812B min. VDD (3.5V), see Rev 2.
D2150060RS75000Red Status LED — 06031Power-on indicator. Current limited by R5.
R5RC0603FR-07680RL680Ω LED Current Limiter1Series resistor for D2 status LED — ~1.9mA at 3.3V.
Passives
C2, C4, C5, C6CC0603KRX7R7BB104100nF Decoupling Capacitor — 06034Placed adjacent to each IC power pin.
C1, C3, C7CL10A106MQ8NNNC10µF Bulk Capacitor — 06033LDO input, LDO output, and 3V3 rail.
R6, R7, R8RC0603FR-0710KL10kΩ Pull-up Resistors3EN (R7), I²C SCL (R6), I²C SDA (R8).
Connectors & Buttons
J2, J3613022111211×22 Pin Header — 2.54mm vertical2Full GPIO breakout, 2.54mm pitch.
BOOT1, RESET1PTS810 SJG 250SMD Tactile Button — SPST2BOOT→GPIO0, RESET→EN.

Design Specifications

PCB Stack-up — JLCPCB JLC04161H-3313
Total board thickness1.6 mm ±10%
Outer copper (L1/L4)1 oz (35µm)
PP prepreg type3313×1
PP prepreg thickness (L1→L2)0.0994 mm
Dielectric constant (Dk)4.4 (prepreg)
Core thickness1.265 mm
Inner copper (L2/L3)0.5 oz (17.5µm)
KiCad Design Rules — JLCPCB
Min copper clearance0.15 mm
Default track width0.20 mm
Via size / drill0.60 mm / 0.3 mm
Min via diameter0.45 mm (DRC minimum)
DP width (USB D±)0.15 mm
DP gap (USB D±)0.15 mm
Hole to hole clearance0.5 mm
Copper to edge0.3 mm
USB Differential Pair — IPC-2141 (Recalculated for JLCPCB)
Target impedance (Zd)90 Ω ±15%
Trace typeEdge Coupled Microstrip
PP prepreg height (h)0.0994 mm (3313)
Dielectric constant (Dk)4.4
Trace spacing (s)0.15 mm (6 mil)
IPC-2141 target width (w)0.142 mm (5.59 mil) → 90 Ω
Actual routed width0.15 mm — slightly wider → ~88 Ω
USB operating speedFull Speed (12 Mbps)
Power Architecture
Input5V via USB-C VBUS
Regulated output3.3V / 800mA max
LDO packageWSON-6 (thermal pad)
RθJA80.3°C/W
Power diss. @ 300mA0.51W → +41°C rise
ESD protectionD3V3XA4B10LP TVS on USB

Design Process

Phase 1 — Schematic Capture
Component selection and schematic design in KiCad 9
Components were chosen from Espressif application notes and each IC's datasheet — the CC resistors took the most time to track down (see What I Learned above). Completed the full schematic: USB-C with CC pull-downs, TLV75801 LDO, ENS210 I²C sensor, WS2812B RGB LED, and GPIO breakout. ERC came back clean on the first pass.
Full ESP32-S3 schematic — KiCad 9 schematic editor
Full schematic — KiCad 9 schematic editor
Phase 2 — Impedance, Constraints & Netclasses
IPC-2141 differential pair impedance for JLCPCB JLC04161H-3313 stackup
Used JLCPCB stackup JLC04161H-3313: PP prepreg 3313×1 with h = 0.0994 mm and Dk = 4.4. Applied IPC-2141 edge-coupled microstrip formula — the calculated target trace width for exactly 90 Ω differential is 0.142 mm (5.59 mil) at 0.15 mm spacing. The USB D± pair was routed at 0.15 mm (default netclass width), which is slightly wider than the target — giving an estimated ~88 Ω, well within USB 2.0 Full Speed tolerance of 90 Ω ±15%.
IPC-2141 impedance calculation — JLCPCB JLC04161H-3313 stackup
IPC-2141 impedance calculation — recalculated for JLCPCB stackup
Design constraints — JLCPCB manufacturing rules
Before routing, design rules were configured to match JLCPCB's JLC04161H-3313 stackup requirements: minimum trace width 0.15 mm (JLCPCB's manufacturing capability is 0.09 mm — a more conservative limit was set in KiCad), minimum via diameter 0.45 mm (drill 0.3 mm), hole-to-hole clearance 0.5 mm, copper-to-board-edge clearance 0.3 mm, and minimum annular ring 0.1 mm. Rules were applied as a KiCad DRC constraint file and a clean DRC pass was confirmed before routing began.
KiCad design rules — JLCPCB manufacturing constraints
JLCPCB manufacturing constraints configured in KiCad design rules
Netclasses — power and signal net classification
Nets were grouped into custom netclasses before routing: PWR (VBUS, VCC, GND) assigned 0.3 mm minimum trace width to handle higher current paths; SIG (GPIO, SPI, I2C, UART) kept at default 0.15 mm. The USB differential pair (D+/D−) was routed at 0.15 mm width and 0.15 mm spacing using the default netclass — within USB 2.0 Full Speed tolerance.
KiCad netclasses — power, signal, and USB differential pair
Custom netclasses defined for power, signal, and USB differential pair
Phase 3 — Component Placement & 3D Verification
Placing components in the right order before touching a single trace
Worked through signal flow — USB-C first, then ESD protection, LDO, and the module last. Decoupling caps go right next to each IC's power pin, not just nearby.
3D model alignment and mechanical clearance review
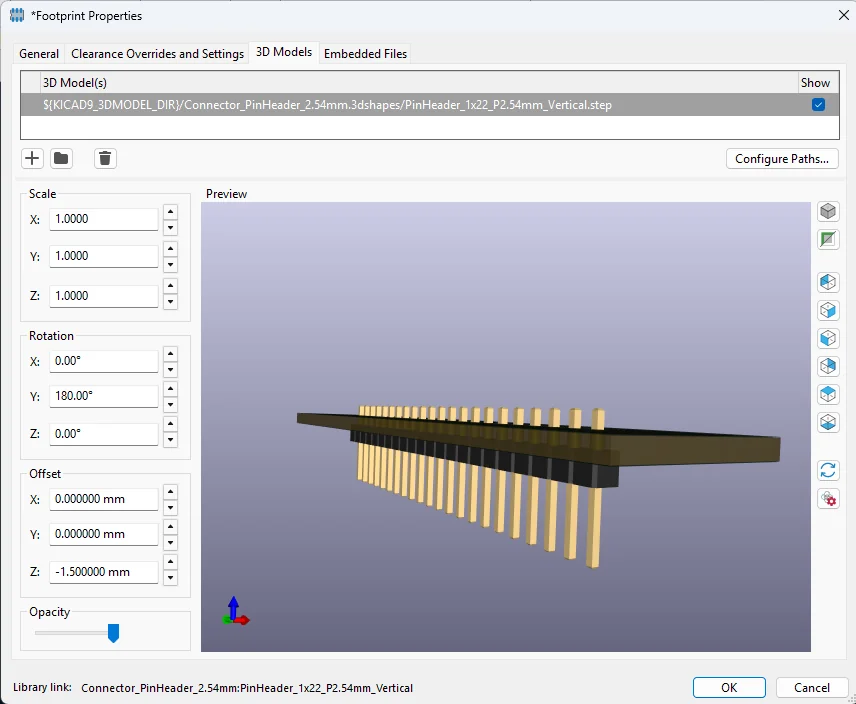
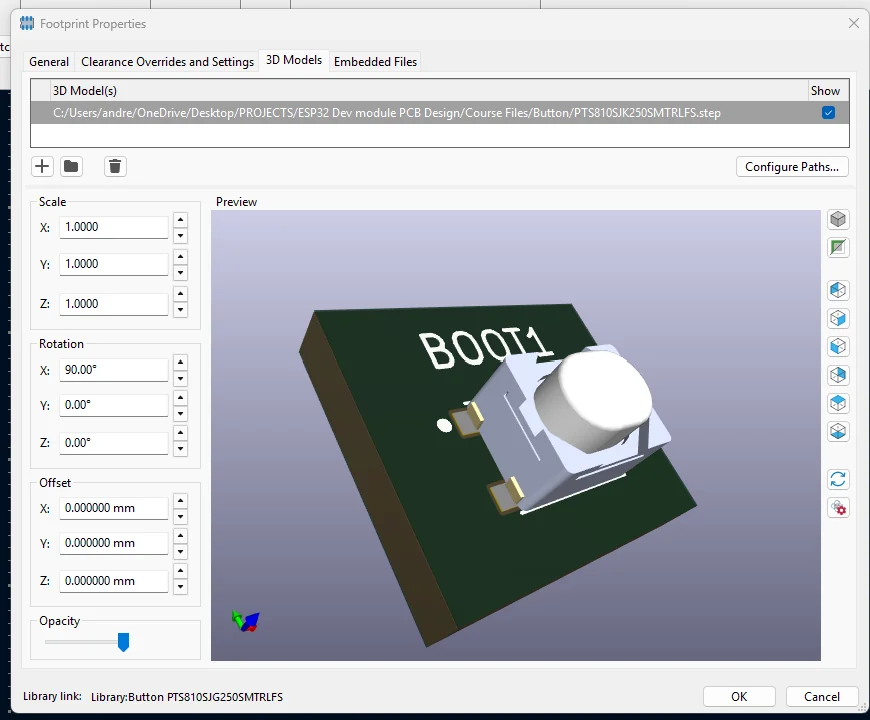
Added STEP 3D models to all components. PTS810 buttons required X-rotation to 90°. Pin headers required Y-rotation 180° and Z-offset −1.5 mm for correct through-hole placement. Reviewed in KiCad 3D viewer before Gerber export.
KiCad PCB editor — component placement, fig. 1
Fig. 1 — Component Placement
KiCad 3D viewer — STEP models placed and aligned
Fig. 2 — 3D Model View
Phase 4 — Routing & Copper Pours
Impedance-controlled routing, differential pairs, and GND pours on all 4 layers
Routed USB D± using KiCad interactive differential pair router at 0.15 mm width, 0.15 mm spacing. Applied GND copper pours across all four layers with via stitching. Zone priorities set per-layer to resolve DRC intersection errors.
KiCad PCB editor — routed board, top copper layer
PCB editor — routed board, top copper layer

Key Engineering Decisions

Native USB over USB-to-UART bridge
Uses the ESP32-S3 built-in USB Serial/JTAG controller via GPIO19 (D−) and GPIO20 (D+) instead of a CP2102N bridge. One fewer IC, lower BOM cost — serial and JTAG still work natively.
USB D± impedance — routed to JLCPCB JLC04161H-3313 stackup
The JLC04161H-3313 stackup publishes its prepreg parameters, which made the IPC-2141 calculation straightforward — no guessing at Dk. Routed at 0.15 mm, slightly above the 0.142 mm target, giving ~88 Ω — well inside the USB 2.0 Full Speed tolerance of 90 Ω ±15%. Full calculation walkthrough is in the Design Process section.
GPIO0, EN, and USB D± excluded from headers — replaced with power pins
GPIO0 is reserved for the BOOT button, EN for the RESET button, and GPIO19 (D−) / GPIO20 (D+) are routed directly to the USB-C connector — none of these are safe or useful to expose on a general-purpose header. The four positions freed up are replaced with additional power and ground pins: each header provides 3V3 and GND at the top (pins 1–2) and a second GND and 5V VBUS at the bottom (pins 21–22). This gives two ground references per header, which is practical for breadboard use and reduces the chance of floating grounds when connecting peripherals.
4-layer stackup with dedicated GND plane on L2
A solid GND plane directly under the signal layer is what makes impedance control and decent RF behaviour possible — the ESP32-S3 Wi-Fi/BT radio needs a clean ground reference, and a 2-layer board can't reliably provide either.
LDO package selection based on thermal analysis
TLV75801 WSON-6 selected over SOT-23: RθJA = 80.3°C/W vs 176.9°C/W. At 300mA load (P = 0.51W), WSON-6 gives only +41°C junction rise vs +90°C for SOT-23. Thermal pad soldered to GND copper pour.
LDO feedback resistors — R3/R4 set Vout to 3.3V
R3 (1MΩ) and R4 (200kΩ) form the TLV75801 output voltage feedback divider. The 1:5 ratio sets the regulated output to 3.3V. Values chosen to minimise quiescent current through the divider while staying within the LDO's feedback input impedance spec.

Design Verification

0
DRC Errors
0
Unconnected Pads
0
Footprint Errors
(1 warning excluded)
Schematic Checks
USB-C CC resistors (5.1kΩ each)✓ Correct
EN pin pull-up (10kΩ to 3V3)✓ Present
GPIO0 boot pull-up✓ Internal (ESP32-S3)
I²C pull-ups on SDA/SCL✓ 10kΩ each
Decoupling caps — all ICs✓ 100nF + 10µF
BOOT strapping pin (GPIO0) excluded from header✓ GPIO0 protected
Layout Checks — JLCPCB Rules
USB DP routed — JLCPCB 3313 stackup✓ 0.15mm / 0.15mm
GND pours — all 4 layers✓ Distinct zone priorities
LDO thermal pad to GND✓ Confirmed
Hole to hole clearance ≥ 0.5mm✓ JLCPCB compliant
Copper to edge ≥ 0.3mm✓ JLCPCB compliant
3D model review✓ All placed & aligned

Assembly & Bring-Up

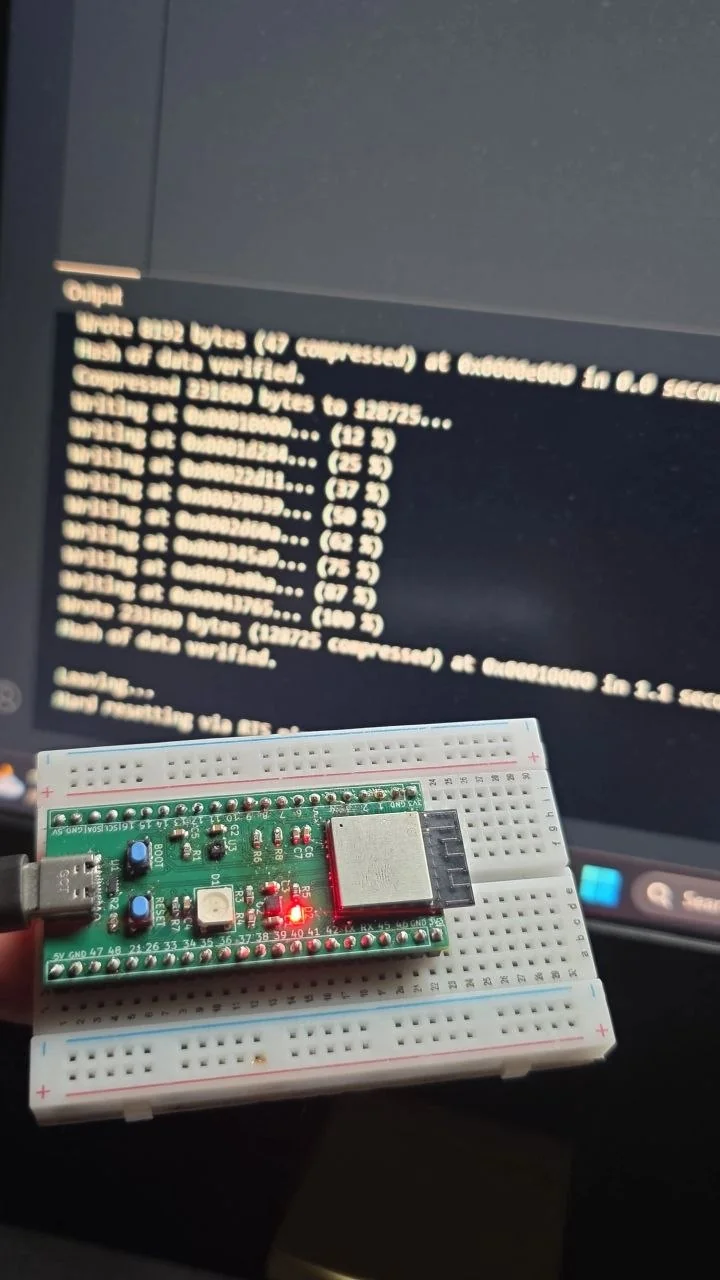
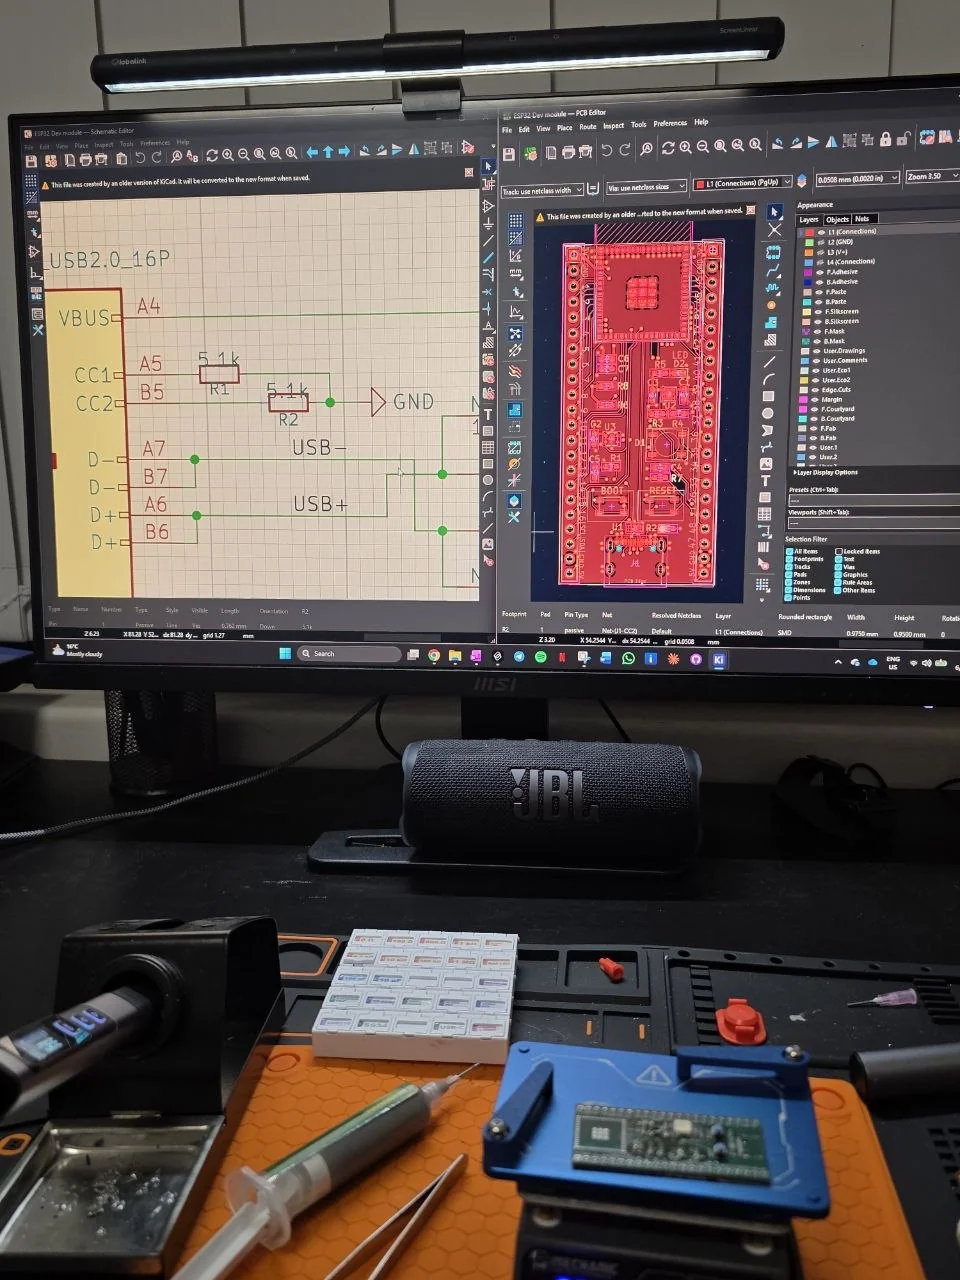
Assembly. JLCPCB made the bare 4-layer board; I placed the SMD parts by hand and reflowed them on a hotplate.

Bring-up tests. Two small test sketches checked the board one block at a time:

1. Sensor and LED: reads the ENS210 temperature/humidity sensor over I²C (GPIO17/18, address 0x43, with the datasheet's CRC check on every reading) and cycles the WS2812B LED on GPIO48.
2. Solder-joint check: drives every header GPIO high then low so each pin can be probed with a multimeter, then turns on the internal pull-up and pull-down on each pin and reads it back. A pin stuck high or low points to a short to 3V3 or GND.

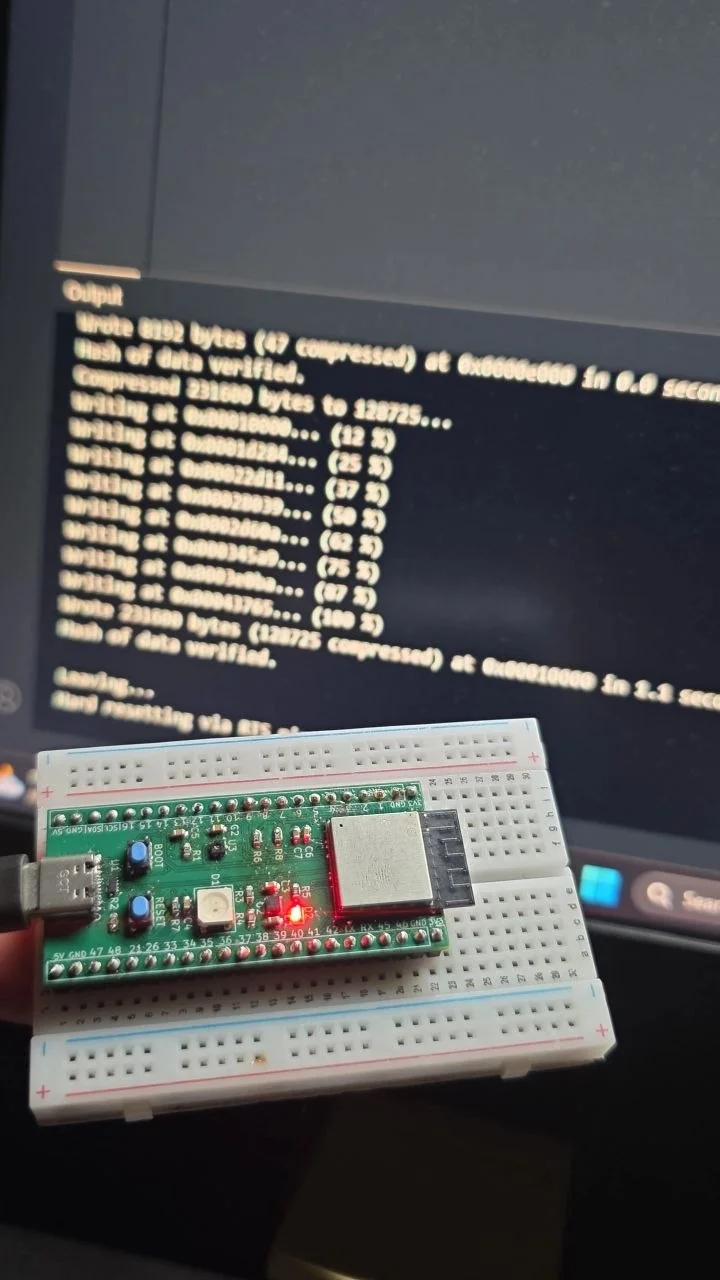
Result. The board flashes over its own USB-C port (no USB-serial chip) and is now the main controller in my Bip biped robot, running its servos, IMU and WiFi updates.

The WS2812B and the red LED (D2) both worked. The ENS210 answered on the I²C scan, but I have not yet checked its readings against a thermometer.
Future Improvements — Rev 2

LDO feedback divider — reduce resistor values in Rev 2
R3/R4 (1MΩ / 200kΩ) set Vout correctly but the high impedance increases sensitivity to PCB leakage. Rev 2 will scale down to 100kΩ / 20kΩ, maintaining the same output voltage while lowering source impedance and improving noise rejection.
WS2812B power supply — Rev 2 fix required
Standard WS2812B minimum VDD is 3.5V; the current 3.3V supply is out of spec. Rev 2 will add 5V power to the LED and a level shifter on the DIN line so the logic high exceeds the 0.7×VDD input threshold. Alternatively, swapping to a 3.3V-compatible variant like the WS2812B-V5 would eliminate the level shifter entirely — something to evaluate in Rev 2.
Footprint library consolidation
Rev 2 will move all custom footprints (ESP32-S3-MINI-1-N8, USB4105) into a project-local KiCad library. This eliminates the footprint mismatch warnings in DRC and makes the project self-contained — no dependency on my local library path.
3V3 pin back-drive protection + bidirectional power input — Rev 2
The TLV75801 has no reverse current protection on its output — powering through the 3V3 header pin back-drives the LDO and will damage it. Rev 2 will add a series Schottky diode or ideal diode load switch, which blocks reverse current and makes it safe to power the board from an external 3.3V supply without USB-C.
Upgrade path — ESP32-S3-MINI-1-N8R8 (PSRAM variant)
Same pinout and footprint as the current module but adds 8MB PSRAM — no PCB changes needed. Worth the swap for anything involving display framebuffers, audio buffers, or memory-intensive applications.
← VHDL Digital Systems ⌂ Portfolio SO-101 Robotic Arm →